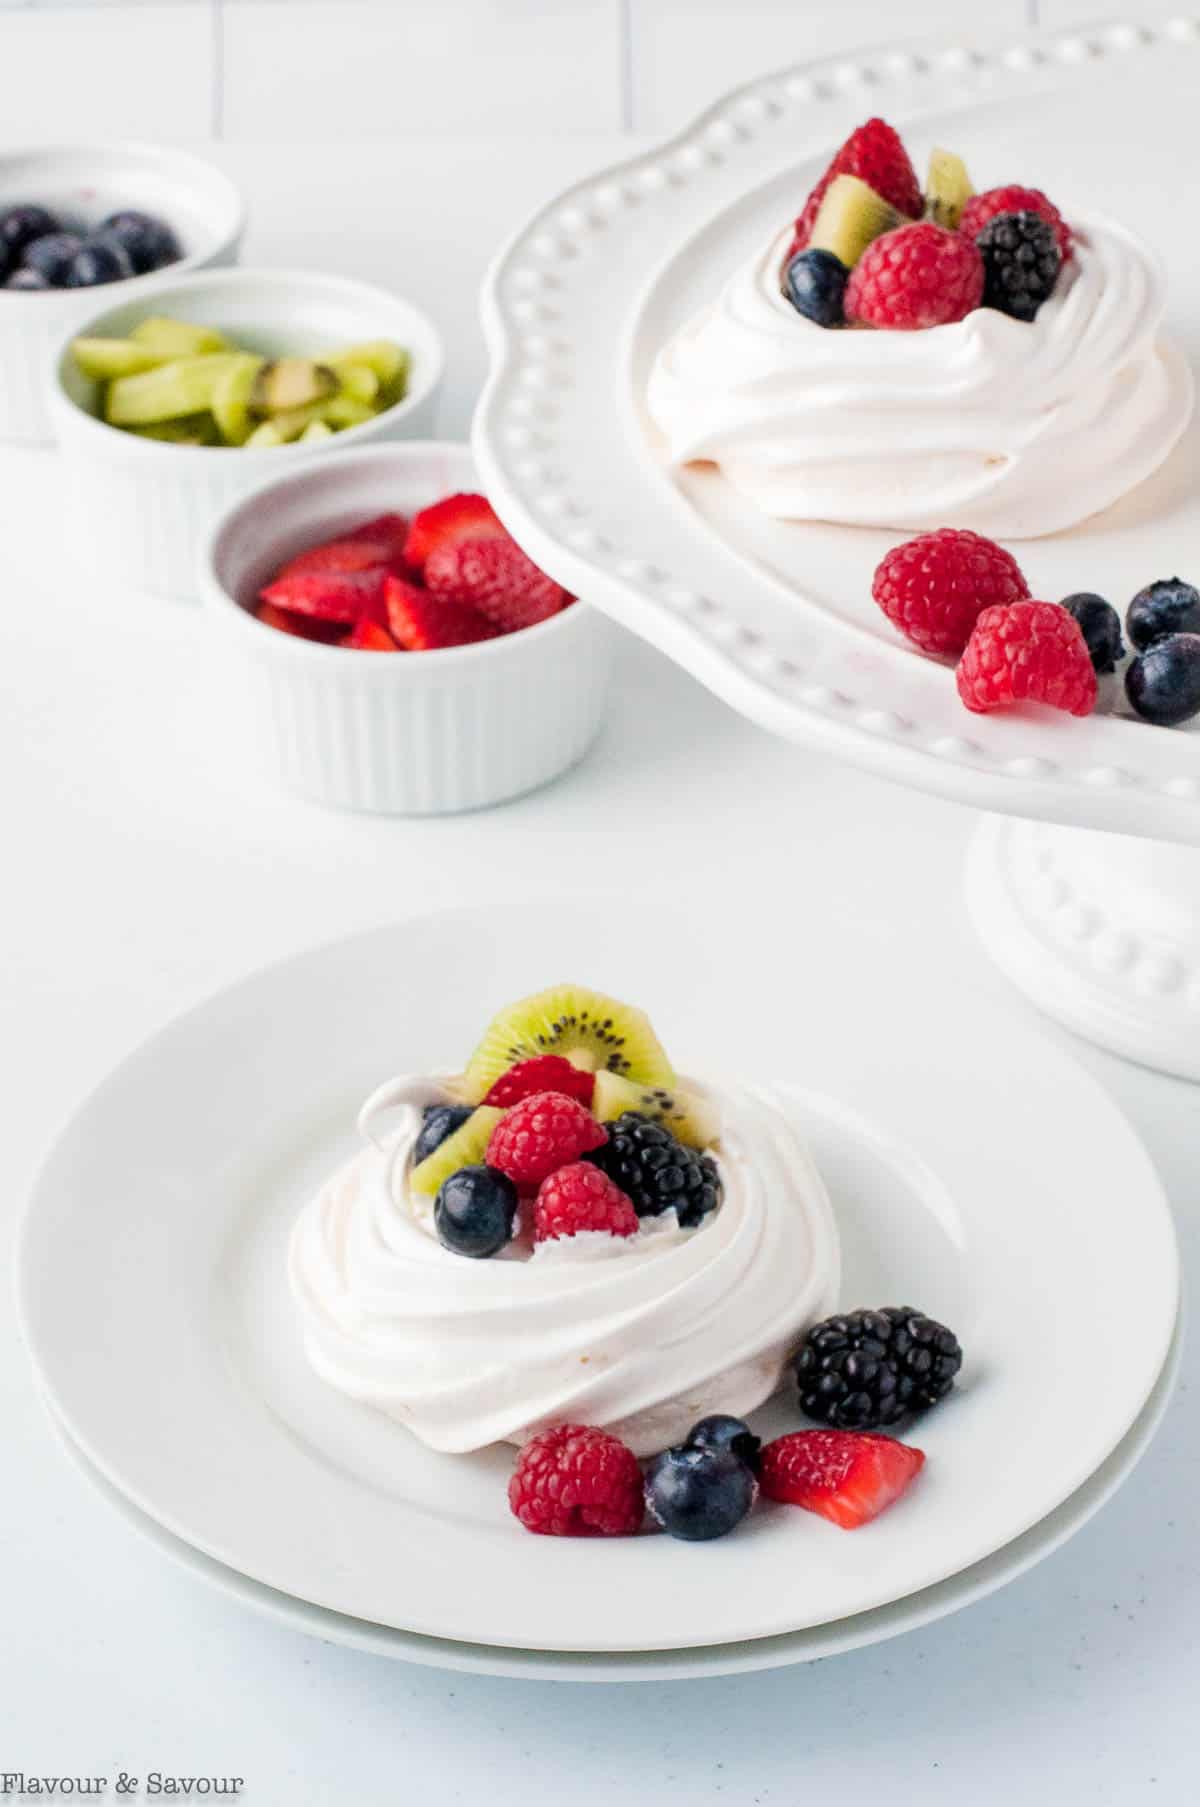
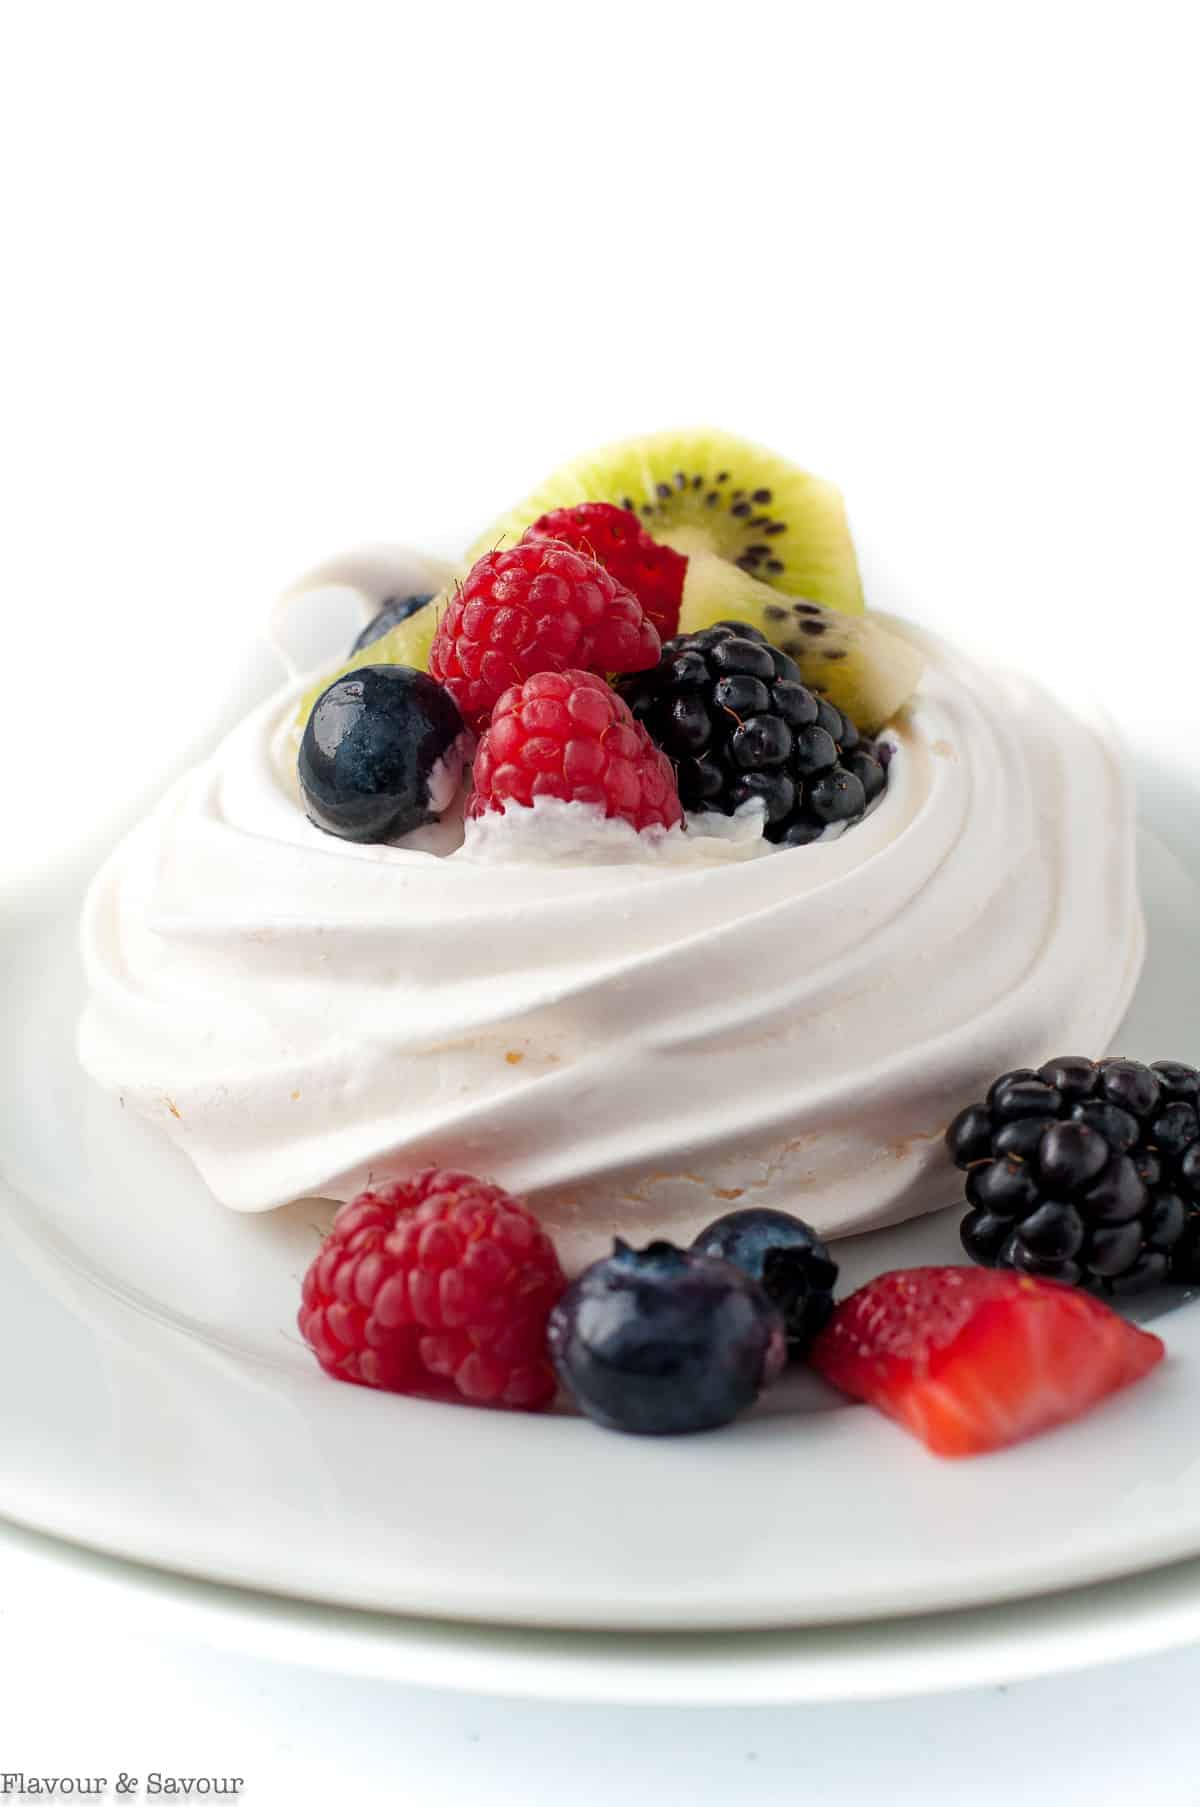
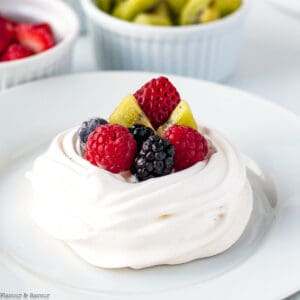
Mini pavlova with fresh berries is a spectacular dessert that's easy to make! Crisp and crunchy on the outside, the center of these individual pavlova desserts has the texture of marshmallows. Fill these meringue nests with fluffy whipped cream and top with berries or sliced fruit for a dessert to remember!

Mini pavlova nests filled with whipped cream and fruit make a showstopper dessert, but they're very easy to make!
Pavlova is a meringue dessert originally popular in New Zealand and Australia that is now loved all over the world. Made with sweetened, stiffly whipped egg whites, pavlova is baked slowly at a low temperature.
The egg whites form a meringue that's crisp on the outside and soft and chewy with the texture of marshmallow inside. It's crisp, it's crunchy it's chewy and it's marshmallowy all in one bite!
And when you fill it with fluffy whipped cream and top it with fresh fruit, berries or lemon curd, you have the dreamiest dessert ever!
Are you still wondering if marshmallowy is actually a word?
Jump to:
❤️ Why you'll love this mini pavlova recipe
- It's convenient! You can make the meringue nests up to three days in advance, then fill and top them just before serving.
- Easy! No special talent is needed. You do need an electric mixer to whip the egg whites to the stiff peak stage.
- Gluten-free! Not a trace of gluten in this recipe, so no worries if you're sharing this with friends with wheat sensitivities.
- Easy to make dairy-free! Simply use whipped coconut milk instead of whipped cream.
- It's pretty! Top it with fresh berries or sliced fruit in season.
🛒 Ingredients and substitutions
You'll find a complete list of ingredients with amounts in the recipe card below. But before we get to the full recipe, here are a few notes about some of the key ingredients.
- Egg whites: eggs are easiest to separate when they're cold, but they will whip into a greater volume when they're at room temperature. Separate the eggs, then let them sit while you prepare a baking sheet and organize the rest of your ingredients.
- Berry sugar is a smaller-crystal sugar, not as fine as confectioner's sugar. It is known as caster sugar in the UK, Australia and New Zealand. If you don't have any, you can grind granulated sugar in your blender. Confectioner's sugar (aka icing sugar) will not work as well in this recipe. Depending on where it is processed, it may contain cornstarch.
- Cream of tartar helps the egg whites to trap and hold air. If you don't have cream of tartar you can use 1 teaspoon of vinegar or lemon juice instead.
- Cornstarch helps to keep the inside of the pavlova fluffy with the texture of marshmallows. It helps soak up any liquid in the meringue. Using cornstarch is helpful when there is humidity in the air when a meringue will absorb extra moisture.
- Vanilla extract: simply for flavour!
- Whipped cream, sweetened with confectioner's sugar to fill the nests (or whipped coconut milk for a dairy-free option.)
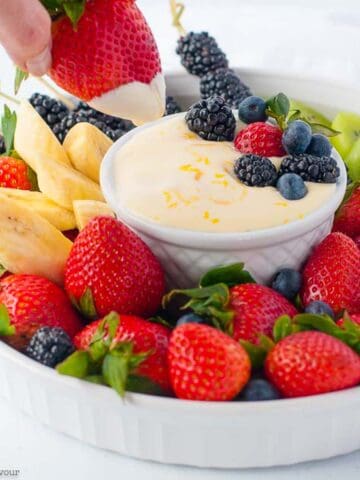
- Fresh berries to top this spectacular dessert!
🔪 How to make mini pavlova desserts
Here's an overview of what you'll do to make this recipe perfectly. You'll find complete instructions in the recipe card at the end of this post.
How to make the meringue nests or base
Step 1: Separate the eggs. Let the egg whites come to room temperature while you assemble your equipment and ingredients.
Step 2: Preheat the oven to 225°F.
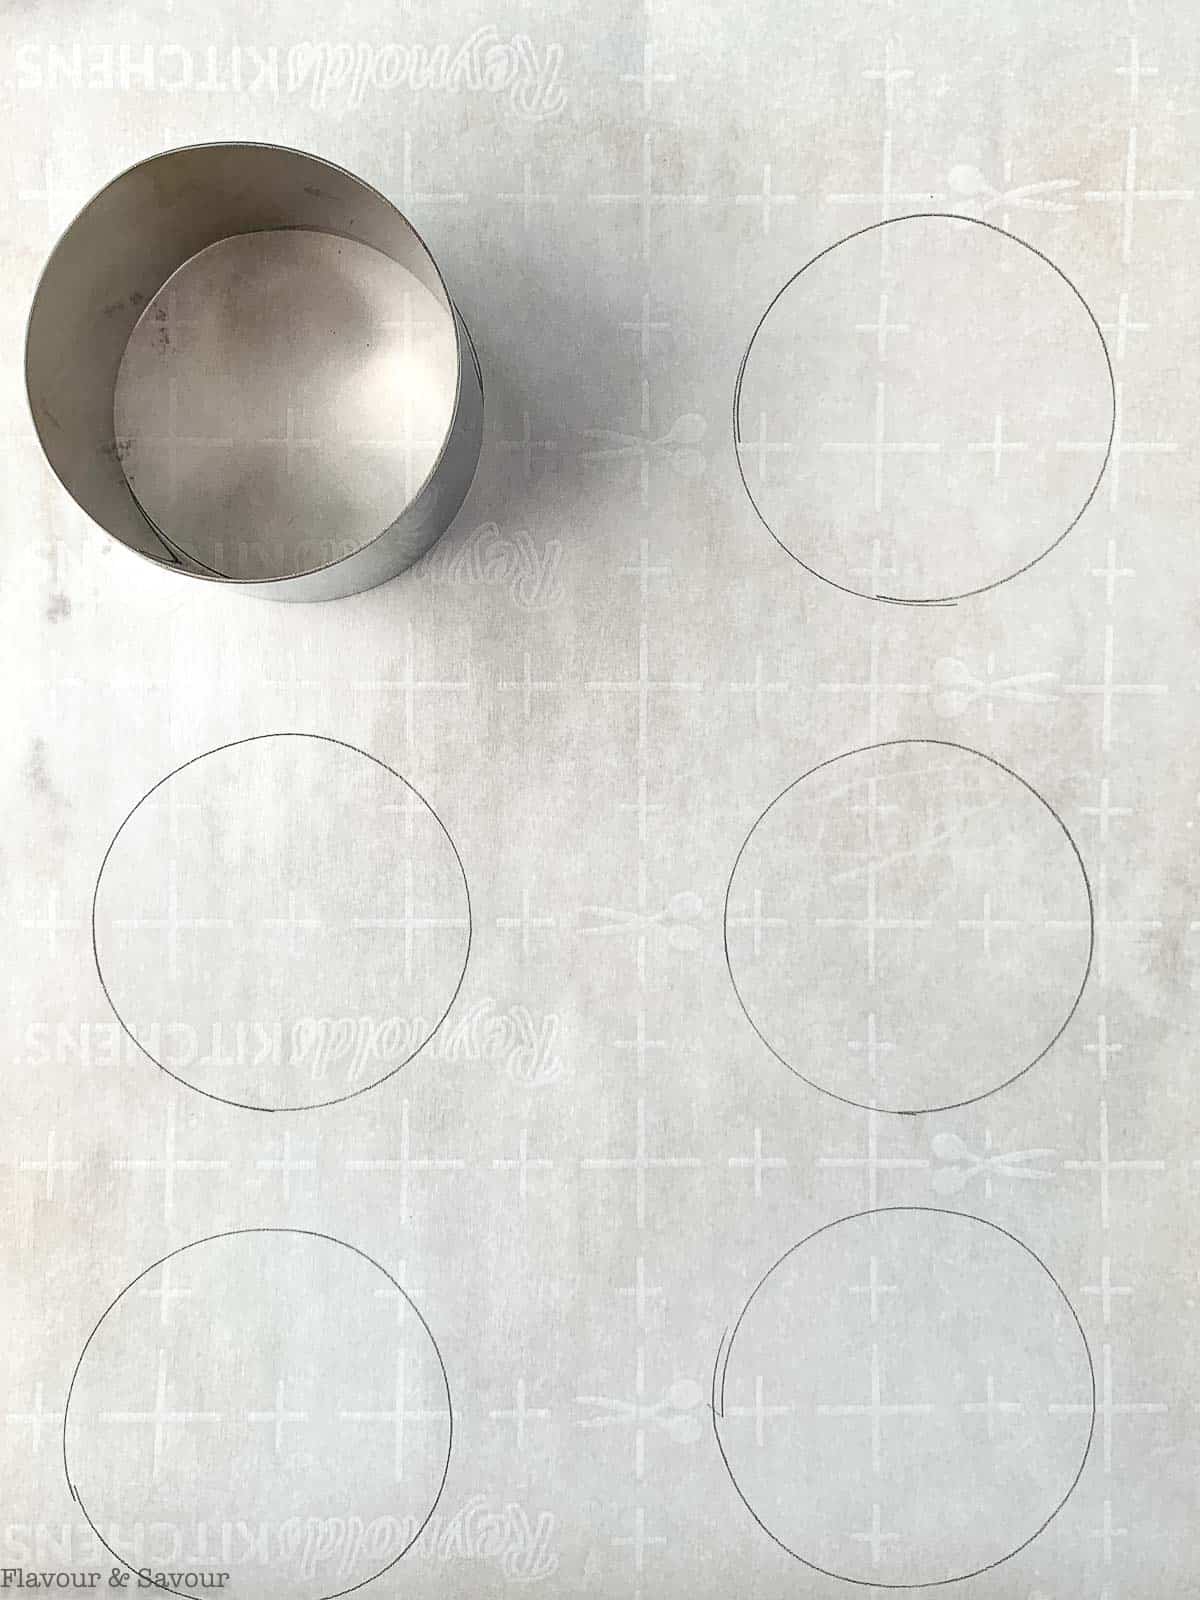
Step 3: Prepare a baking pan. Draw circles about 3 inches in diameter with a pencil on a piece of parchment paper.
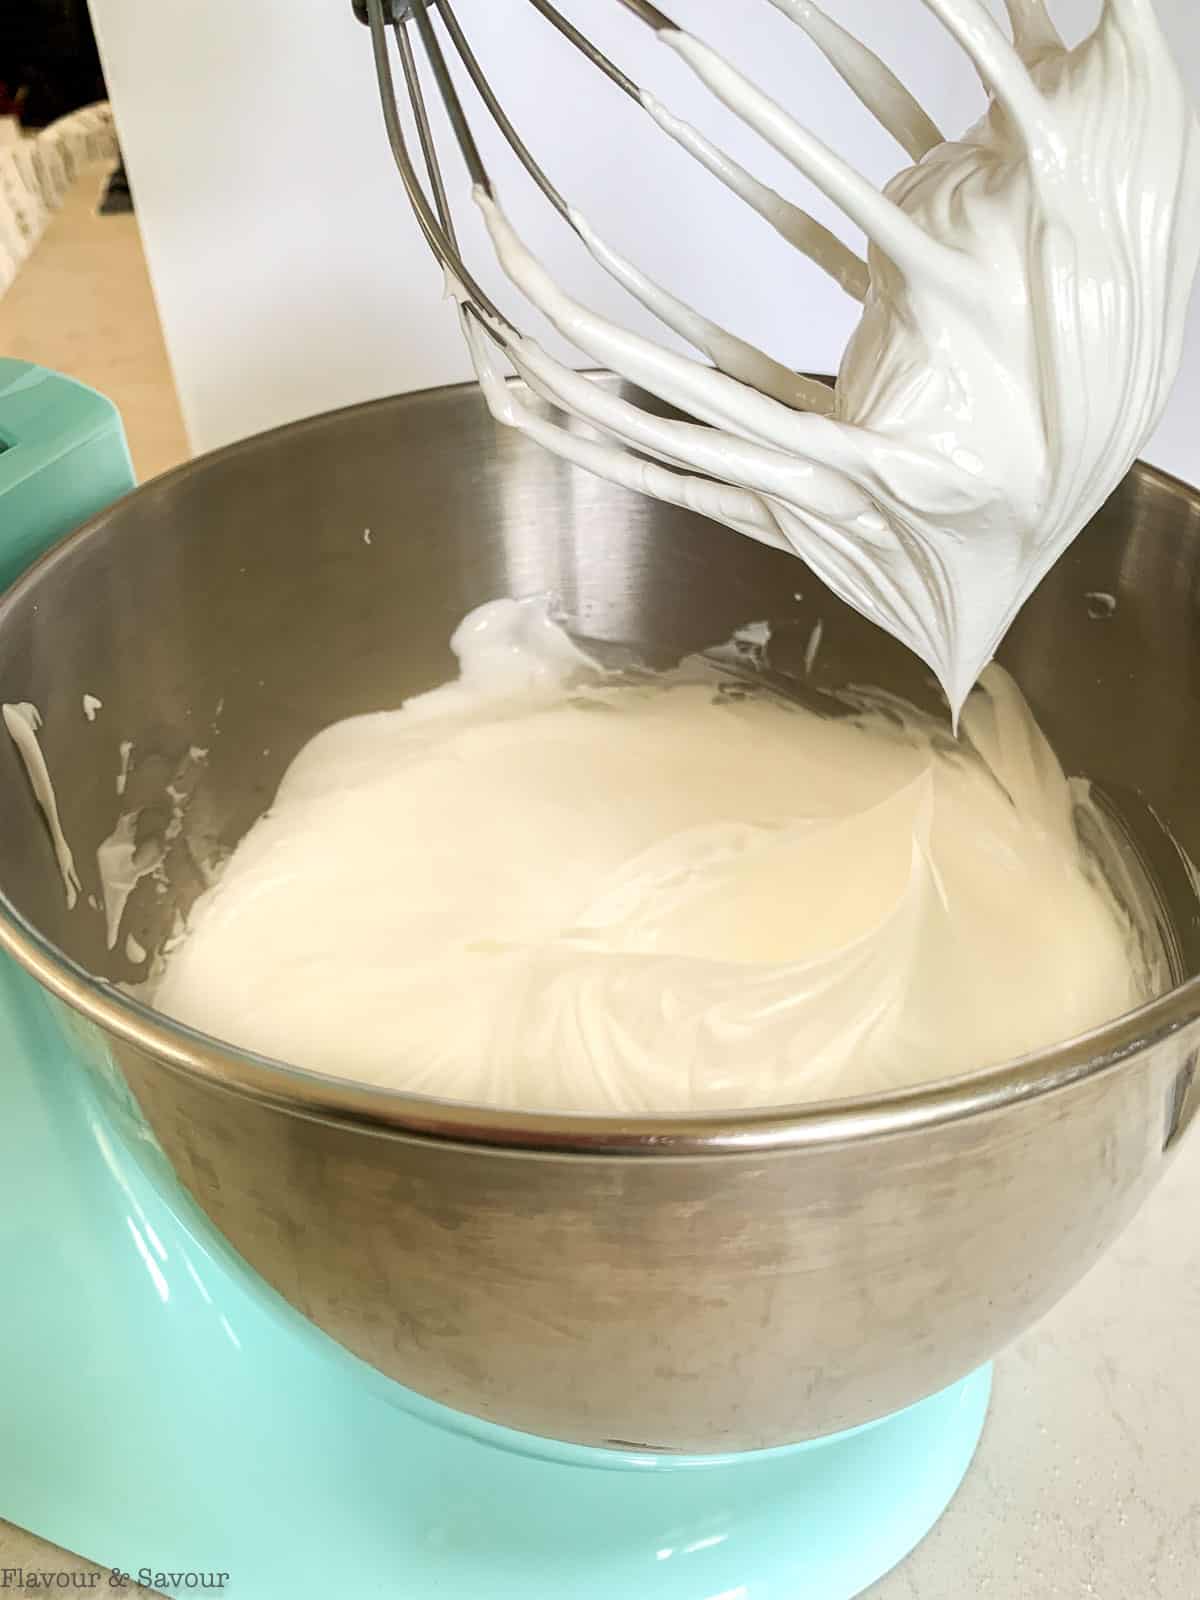
Step 4: Whip the egg whites at low speed (3 - 4) to the soft peak stage in a squeaky clean metal, glass or copper bowl.
Step 5: Add the sugar gradually and continue beating the whites until they've reached the stiff peak stage (when the peaks do not curl over.)
Step 6: Fold in the cream of tartar (or vinegar or lemon juice), sift in the cornstarch and beat for a few seconds.
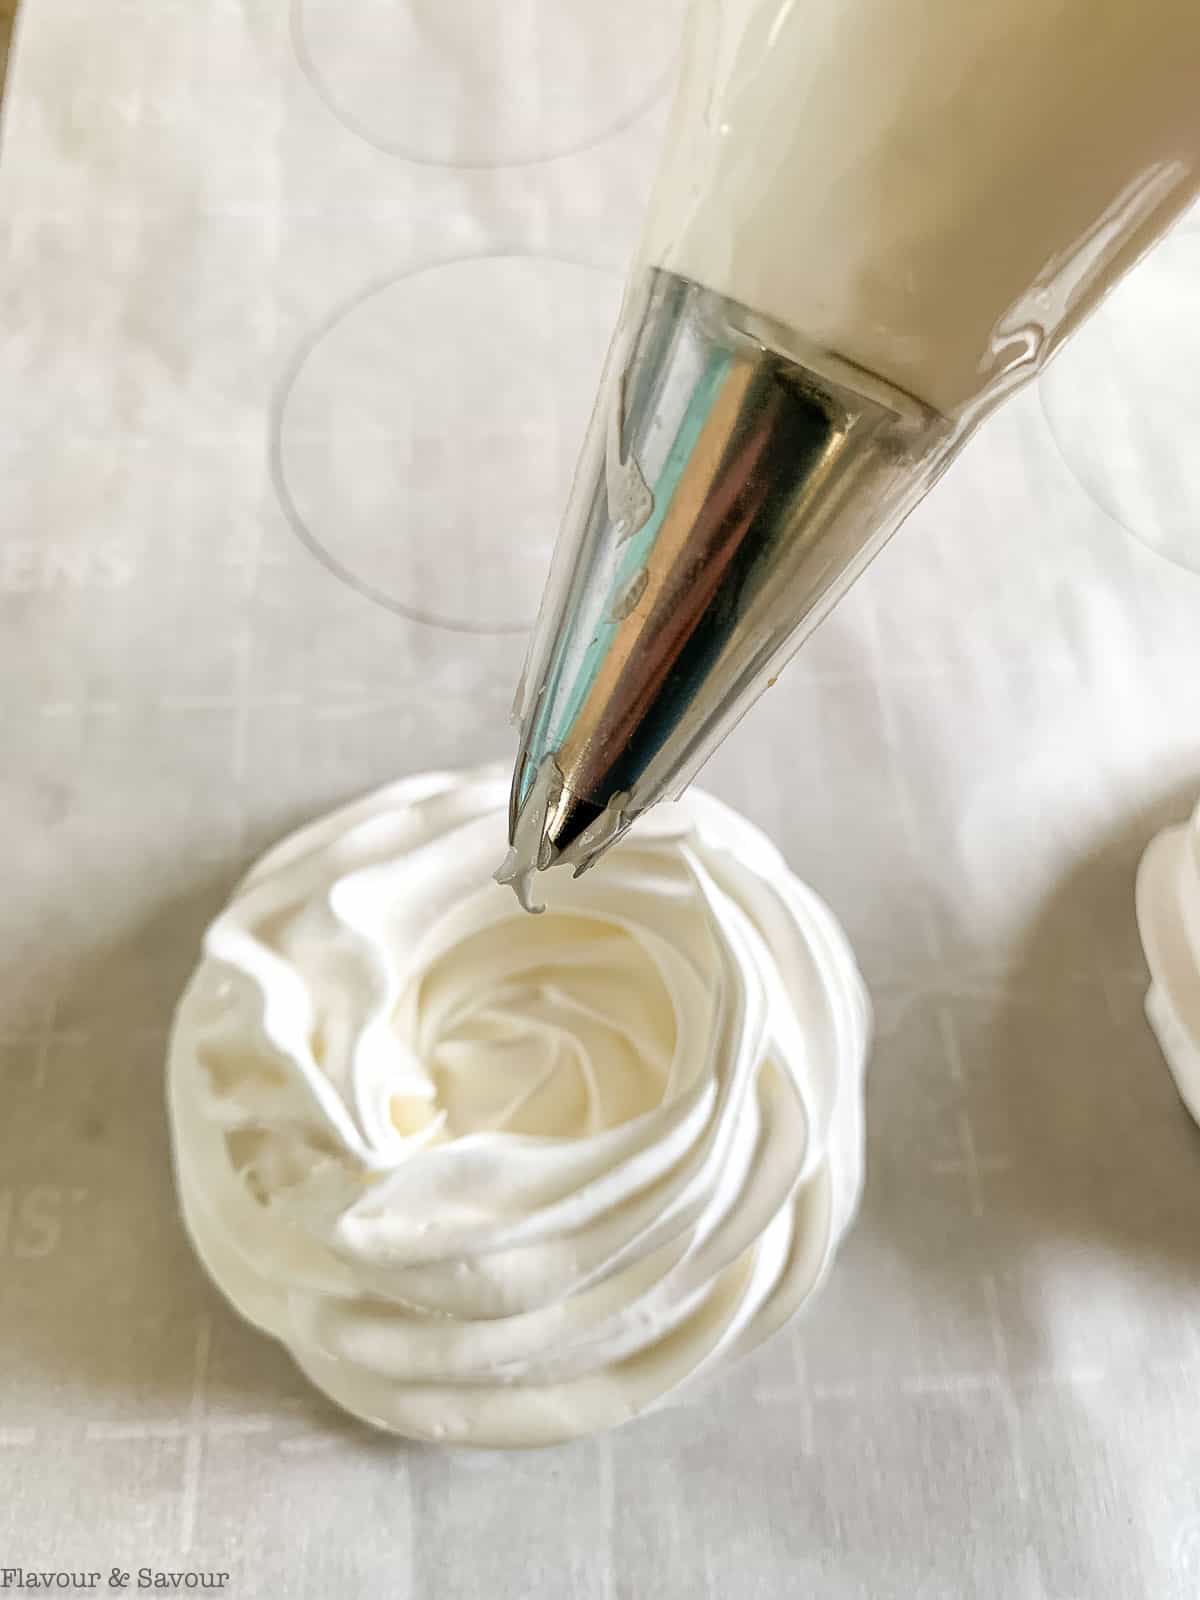
Step 7: Transfer to a piping bag fitted with a large star tip. Beginning in the center of each circle you previously drew, pipe circles of meringue in a spiral. When you reach the outer edge, pipe one or two layers on the edge to create a "nest" for your filling.
Step 8: Bake for 90 minutes at 225°F. then turn the oven off and leave the meringues in the oven with the door closed for 30 minutes.

How to fill meringue nests
Whip the cream. Chill a bowl and beaters, then whip heavy cream with and confectioner's sugar on medium-high speed.
Watch carefully, as it's easy to overbeat cream. You'll know it has reached the soft peak stage when the peaks droop down slightly but don't completely lose their shape.
Chill the whipped cream until you're ready to assemble the pavlova.
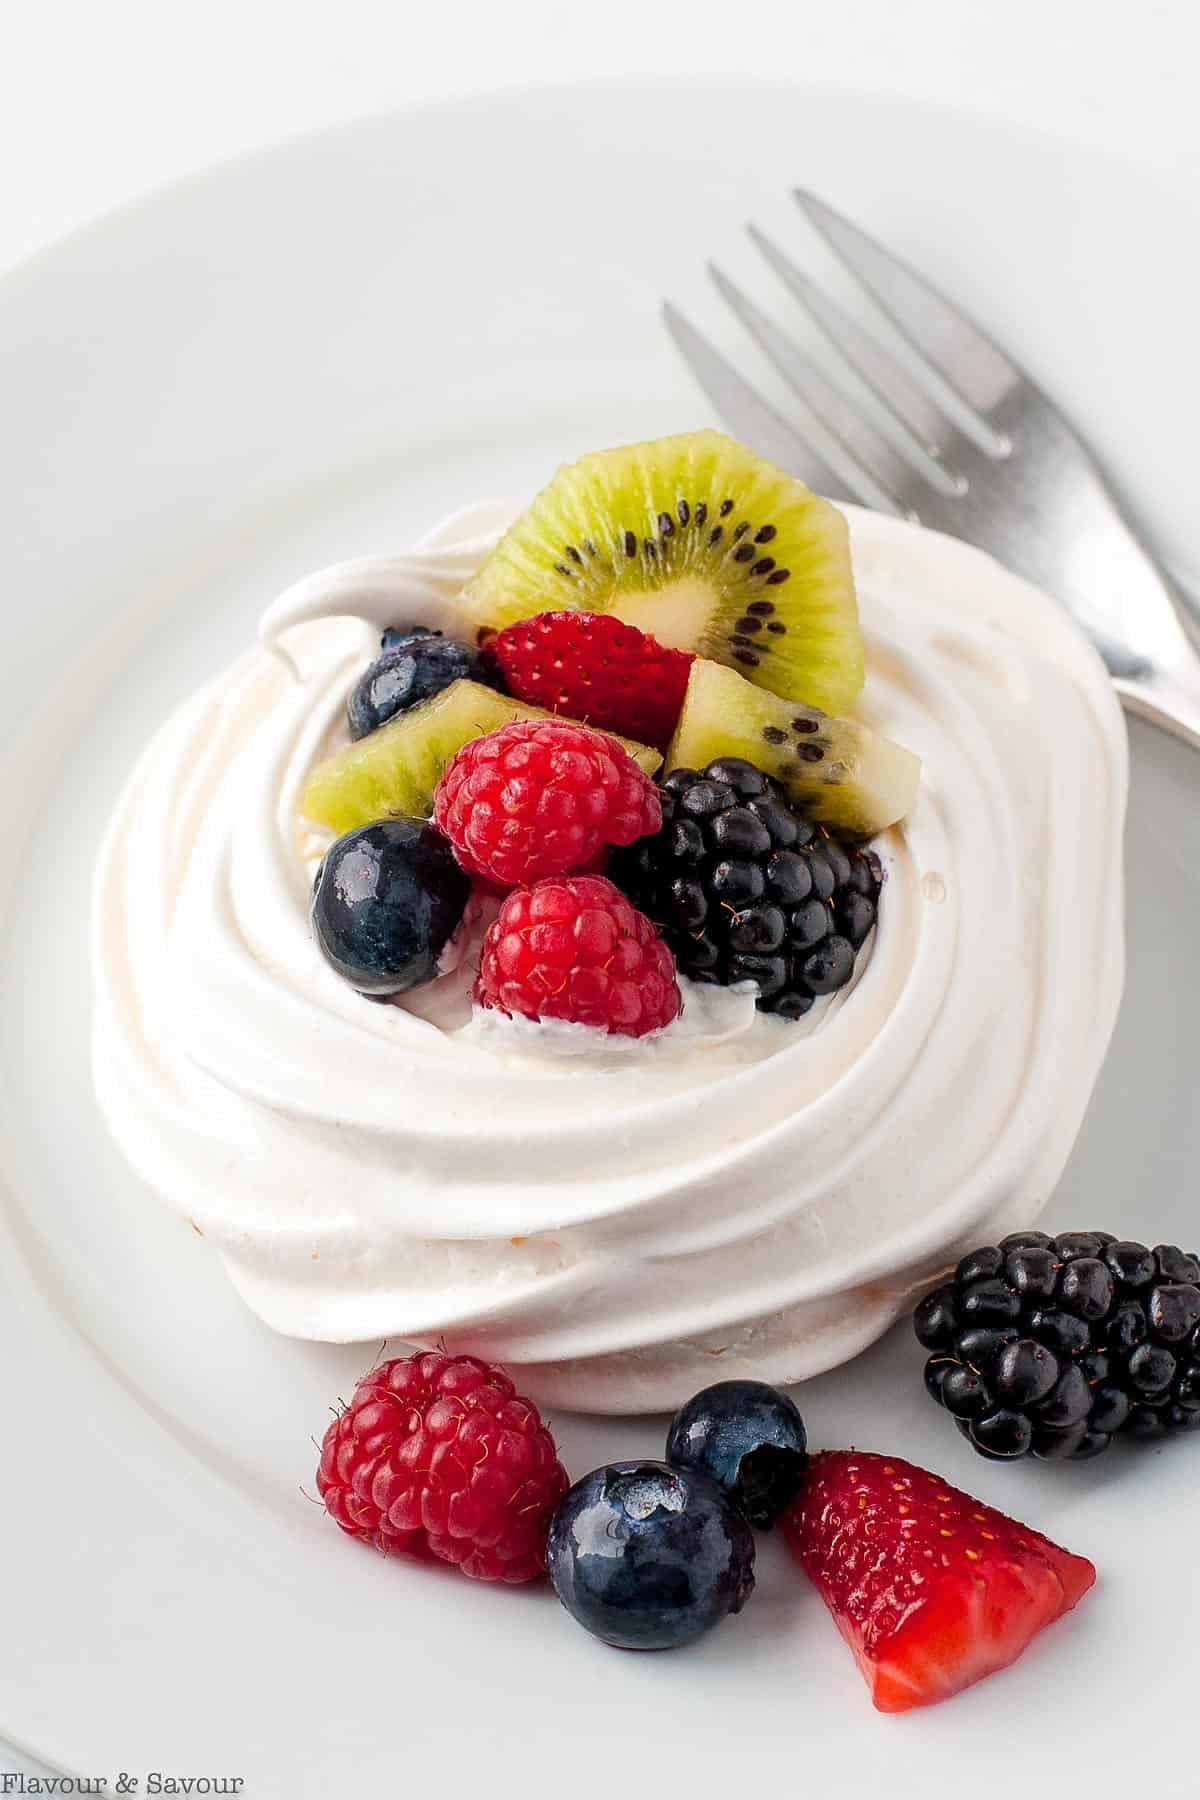
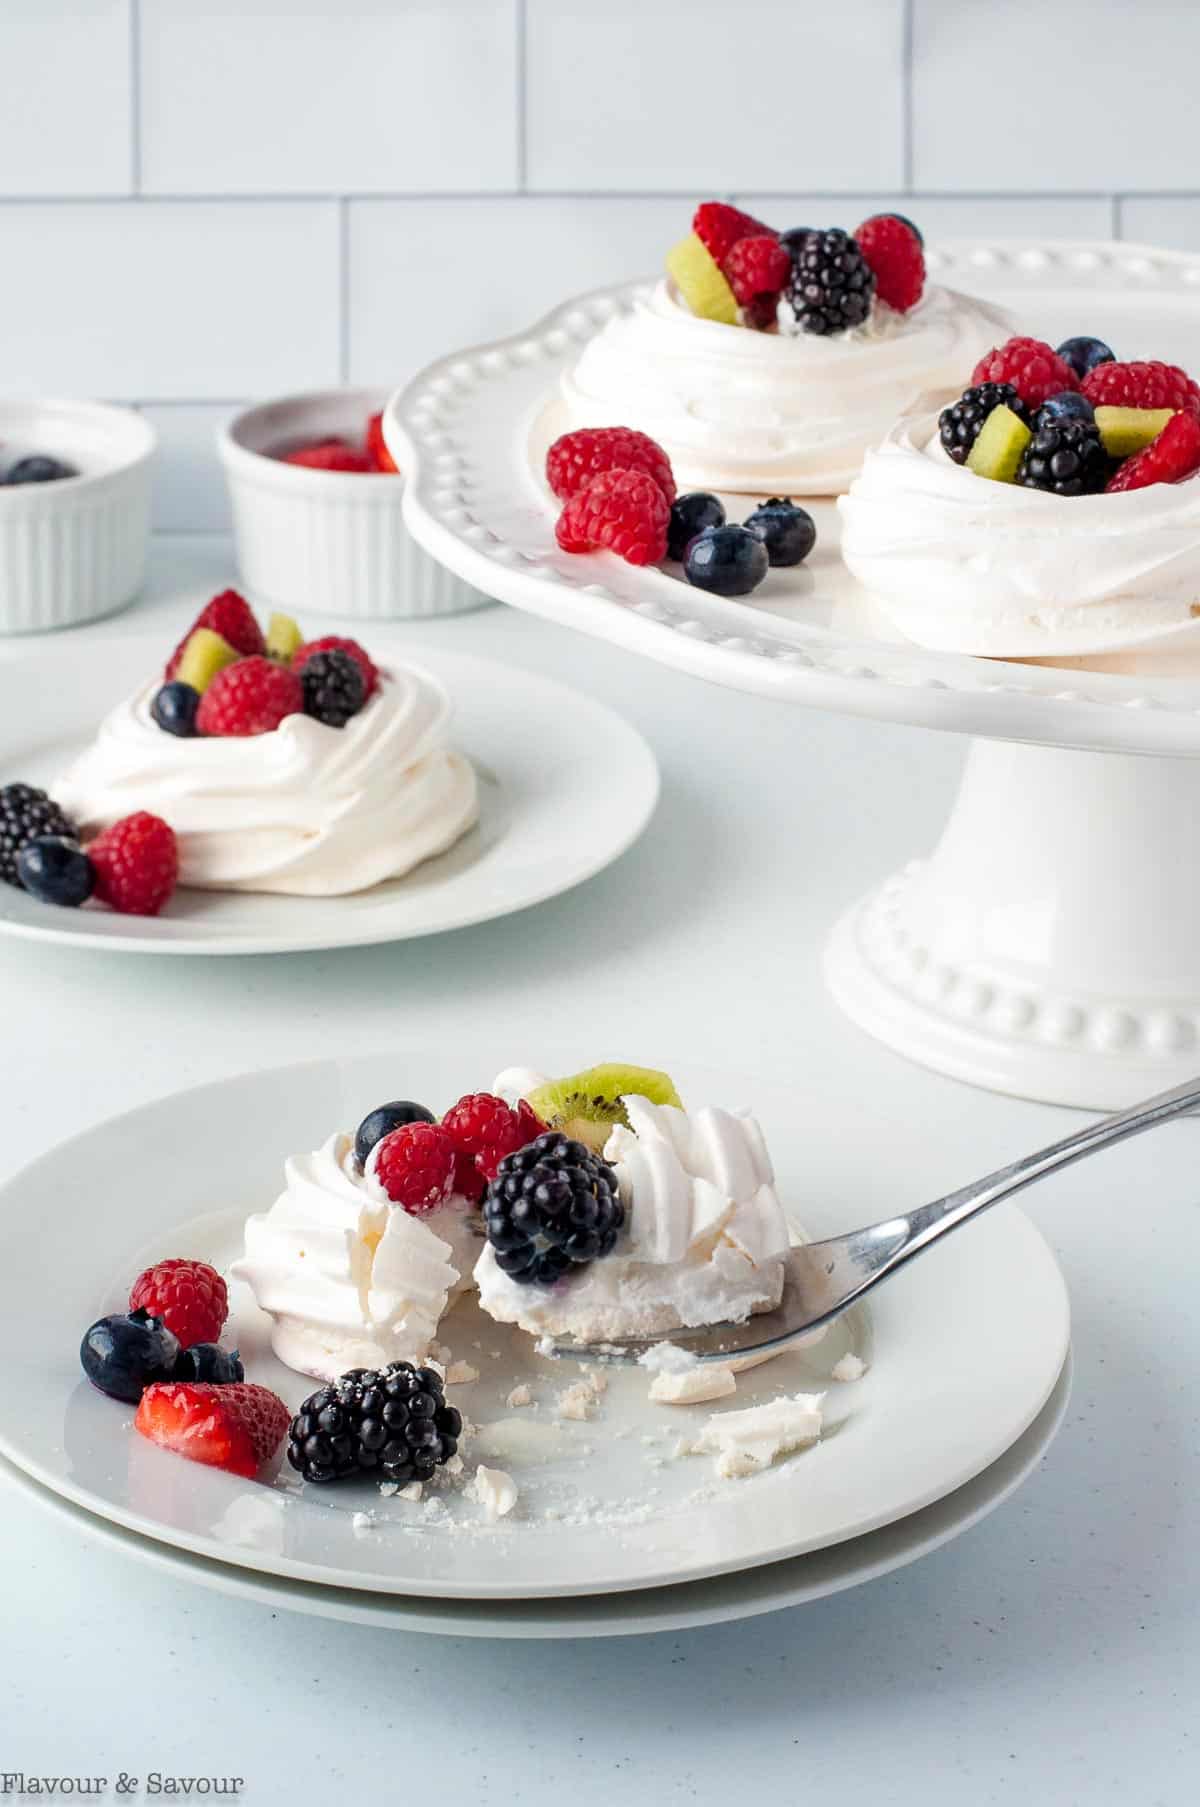
Fill the center of the meringue bases with whipped cream, then top with berries or sliced fruit. Top with a mint sprig or leaf if you like, and serve. If you fill them too far in advance, the whipped cream may start to soften the meringues.
👍🏼 Helpful Tips
- To separate the egg yolk from the egg whites, I like to let the whites fall into a small bowl or measuring cup before transferring them into the mixing bowl. In this way, if I accidentally break a yolk and it gets into the whites, I know I haven't ruined all the whites. I'll only have one to replace, not them all.
- Be sure to use a scrupulously clean bowl and beaters to whip the whites. Even a tiny amount of grease may prevent them from whipping properly.
- While it may be tempting to whisk the egg whites at a high speed, you risk adding air too fast. Your pavlova may collapse as a result. It's best to be patient and whisk them at a low speed (3 - 4) until soft peaks form. This sometimes takes up to 10 minutes.
- Add the sugar to the whipped egg whites gradually, a tablespoon or two at a time to make sure it is fully dissolved. If it doesn't dissolve, you may find the pavlova "weeps" once it's baked.
- The final meringue should be stiff and look thick and glossy if it has been beaten properly.
❓You may be wondering . . .
90 minutes at 225°F. then let them sit in a closed oven for 30 minutes.
Two ways.
1. Use a piping bag with a large star tip to form circles as described in the instructions.
2. Form small mounds on a baking sheet and use a spoon to create a cavity in the center.
You can prepare these meringues 3 days or more in advance. Meringues kept in a completely airtight container where there is no moisture can be stored for up to 2 weeks.
Yes, meringues freeze well. Make sure they are completely cooled, then freeze in a single layer before transferring them to an airtight container for longer storage. They will last for 3 months or longer.
Pavlova is best eaten within a few hours after you've added the whipped cream. The cream will tend to soften the meringue base and it will lose its delightful crunch!
🍽 Ways to serve pavlova
The possible variations to top pavlova are almost endless! Here are a few suggestions for ways to top pavlova.
- fresh berries: sliced strawberries, raspberries, blueberries, blackberries
- fresh fruit: kiwifruit, mango, peaches, nectarines, apricots
- lemon curd: use my 5-minute Microwave Honey Lemon Curd recipe or my stovetop Paleo Lemon Curd recipe
- fruit sauce: blackberry coulis, strawberry sauce, a simple cherry sauce or your favourite fruit sauce.
🗒 More crave-worthy gluten-free dessert recipes
When you make this recipe, please leave a comment and a rating below. I love hearing from you! Thanks in advance. Subscribe to my newsletter and receive new recipes delivered straight to your inbox once a week.
📖 Recipe
Mini Pavlova with Berries
Equipment
Ingredients
Meringue
- 6 large egg whites, at room temperature
- 1 ½ cups berry sugar or caster sugar*
- ¾ teaspoon cream of tartar*
- 1 teaspoon cornstarch
Whipped Cream and Berries
- 1 cup heavy cream, (whipping cream)
- 2 tablespoons confectioner's sugar
- 1 ½ cups berries or sliced fruit, or more, as desired
- mint leaves, optional, for garnish
Instructions
For the meringue base
- Separate the eggs. Let the egg whites come to room temperature while you assemble your equipment and ingredients.
- Preheat the oven to 225°F.
- Prepare a baking pan. Draw circles about 3 inches in diameter with a pencil on a piece of parchment paper.
- Whip the egg whites at low speed (3 - 4) to the soft peak stage in a squeaky clean metal, glass or copper bowl.
- Add the sugar gradually, a couple of tablespoons at a time. Continue beating the egg whites until they've reached the stiff peak stage when the peaks do not curl over.
- Fold in the cream of tartar (or vinegar or lemon juice), sift in the cornstarch and beat for a few seconds more.
- Transfer to a piping bag fitted with a large star tip. Beginning in the center of each circle you previously drew, pipe circles of meringue in a spiral. When you reach the outer edge, pipe one or two layers on the edge to create a "nest" for your filling.
- Bake for 90 minutes at 225°F. then turn the oven off and leave the meringues in the oven with the door closed for 30 minutes.
For the Filling and Topping
- Chill a bowl and beaters, then whip heavy cream with confectioner's sugar on medium-high speed.Watch carefully, as it's easy to overbeat cream. You'll know it has reached the soft peak stage when the peaks droop down slightly but don't completely lose their shape.Chill the whipped cream until you're ready to assemble the pavlova.
- Fill the center of the meringue bases with whipped cream, then top with berries or sliced fruit. Top with a mint sprig or leaf if you like, and serve. (If you fill them too far in advance, the whipped cream may start to soften the meringues.)
Notes
- Please refer to the post for helpful tips to make this recipe turn out perfectly.
- Berry sugar is finely ground sugar, not as finely ground as confectioner's sugar. If you don't have any, you can grind granulated sugar in your blender.
- Cream of tartar helps the egg whites to trap and hold air. If you don't have cream of tartar you can use 1 teaspoon of vinegar or lemon juice instead.
- Cornstarch helps to keep the inside of the pavlova fluffy with the texture of marshmallows.
Karen DeJute
I would like to make these but, do you have a recipe for a marbled chocolate pavlova? Planning on filling them with chocolate and strawberry mousse.
Elaine
Ooooh that sounds delicious! I haven't made that myself (yet--must do!) but you might want to try this one in the meantime. https://www.sugarsaltmagic.com/swirled-chocolate-pavlova/
Linda Hearsey
Can you make this Keto by using sweetener instead of sugar?
Elaine
Hi Linda, Yes, you can use Monkfruit--there are a few recipes online for Keto pavlova. I haven't tried it myself, so I'm not sure if it would have the same marshmallowy texture inside. If you try it, let me know!
Andrea
Adorable! My girls would love these ❤️
Elaine
They're fun to make, and even more fun to eat!
Terri
I love how light these are - they'd be perfect for Easter dinner dessert or any heavier meal! And I especially love how pretty they look!
Elaine
Thanks so much, Terri!
Cindy Mom the Lunch Lady
These mini pavlova are so beautiful. I love meringues and love that you can use any fruit/berries you like. Such a lovely and light dessert.
Elaine
Thanks for taking the time to comment, Cindy!
Marie
I love me a Pavlova! The nice thing about individual Pavlovas is that it's easier to portion out, so you don't end up plowing through half of a normal sized one.
Then again, individual ones mean actually knowing how many servings you're going though, LOL.
nancy
super cute tasty desserts. would recommend.
Vanessa
I first fell in love with pavlova while living in Australia! I topped mine with strawberries and passion fruit since passion fruit was such a common topping in Oz. Making and eating these brought back such wonderful memories.
Bernice
How pretty are these little nests?! They are too cute and I like that you can add any fruit that you like. Sometimes after a large meal (like an Easter feast) you just want a little something sweet and these would be perfect.
Asha
How adorable! I love your mini pavlovas. They are so perfectly sized and great for topping with seasonal fruit.