Use these quick refrigerator pickled beans as a garnish for Bloody Mary or Caesar cocktails, as a side dish at your next barbecue, as part of a grazing board, or just as a snack. This is a great recipe if you've never made refrigerator pickles before. No canning needed. These dilly pickled green beans are crisp and tangy with a satisfying crunch!
If you love pickled green beans but don't want to bother with the fuss of making them, this recipe for quick refrigerator pickled beans without canning may be just what you need! If you've never made pickles before, here's a good place to start.
Every summer I'm overloaded with fresh green beans from my garden, even though I plant less each year.
I pawn them off on anyone who comes to my home, and I eat them raw, steamed, sautéed, in Green Bean Potato Salad with Anchovy Dressing, Green Bean Blue Cheese Salad and in this Sesame Ginger Green Bean dish.
So when my bean plants are producing far more than we can eat, it's time to make refrigerator pickled beans!
Jump to:
- ❤️ Why this recipe works
- 🛒 Ingredients for pickled green beans
- 🔪 Step-by-Step Instructions
- 🔁 Possible Variations
- How to store quick pickled beans
- ❓FAQ's about this pickled green bean recipe
- Safety Precautions for no-canning pickles
- Are refrigerator pickles safe for kids to eat?
- Delicious ways to use pickled beans
- 🗒 More recipes for quick refrigerator pickles
- 🌟 Did you make this recipe?
- 📖 Recipe
❤️ Why this recipe works
- No special equipment needed! These refrigerator dilly beans are easy to prepare and need no special equipment.
- No canning required. If you're looking for a recipe for pickled green beans without canning, this one is for you! They don't need to be canned, because you will store them in the fridge.
- Quick to make. This is an easy recipe that takes very little time to make. You'll have pickled beans on hand for the next time you want a Bloody Mary or a Caesar cocktail! These make a crisp and tangy stir stick for savoury cocktails, and a tasty addition to a charcuterie board.
- Crisp and crunchy green bean pickles! You can vary the seasonings by adding more or less garlic or different herbs. You'll find more suggestions for adapting this recipe below.
🛒 Ingredients for pickled green beans
Here's what you'll need to make these no-cook refrigerator pickled beans.
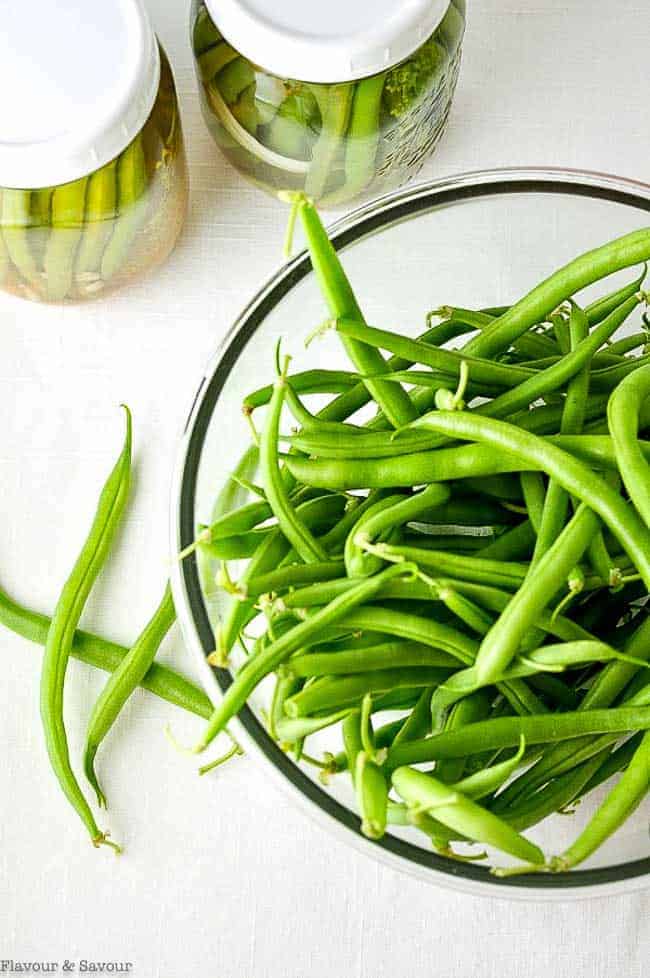
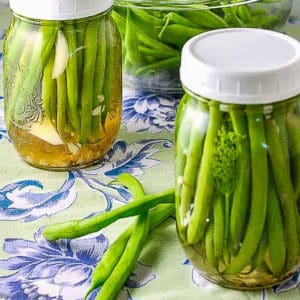
- 2 cups green beans (fresh). You'll need enough to completely fill a 16 oz. Mason jar, which is about 2 cups or one pint. If the beans you have are long, you may want to use a taller one-quart Mason jar. In this case, you'll need to double this recipe for the brine.
- 1 cup vinegar, white or apple cider or white wine vinegar
- 1 cup water
- 2 tsp sugar
- 1 - 2 cloves minced garlic OR 1 to 2 tablespoons minced garlic scapes
- 1 ½ tsp coarse sea salt
- 2 - 3 sprigs of fresh dill
- 1 slice of a small onion
- ½ tsp whole black peppercorns
- ¼ to 1 tsp red pepper flakes, depending on how spicy you want the pickled beans to be.
🔪 Step-by-Step Instructions
- Make the brine first, as it needs to cool. Combine the brine ingredients: (vinegar, water, sugar, salt and garlic) in a medium saucepan and heat to boiling. Remove from the heat and let it cool. Meanwhile, sterilize the jar(s) and lid(s) by washing in hot soapy water, rinsing thoroughly and pouring boiling water over all. Let stand for a few minutes.
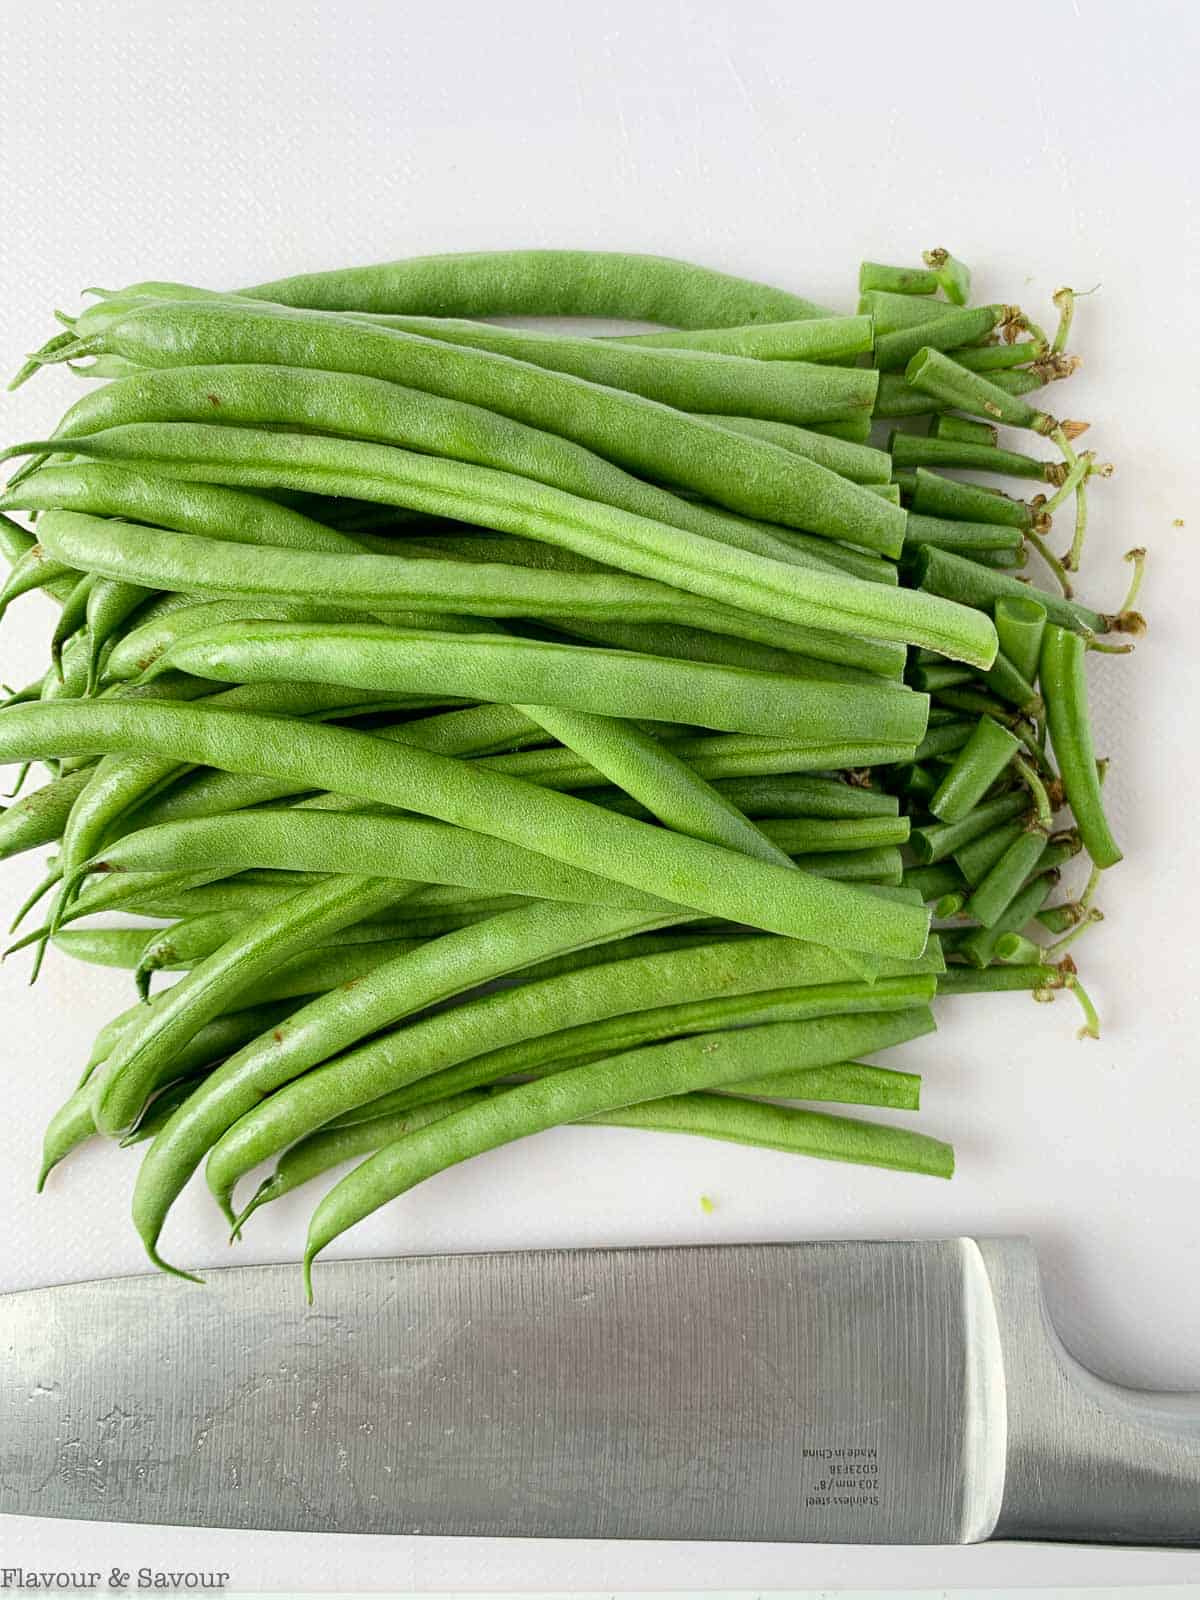
- Prepare the beans. Wash and remove the stems but leave the tip on.
- Fill the empty jar, using the straightest beans so you'll know exactly how many to use.
- Time to trim. Next, remove them from the jar and trim the bunch all at once with a sharp knife so that they will fit in the jar with about ½ inch of headroom.
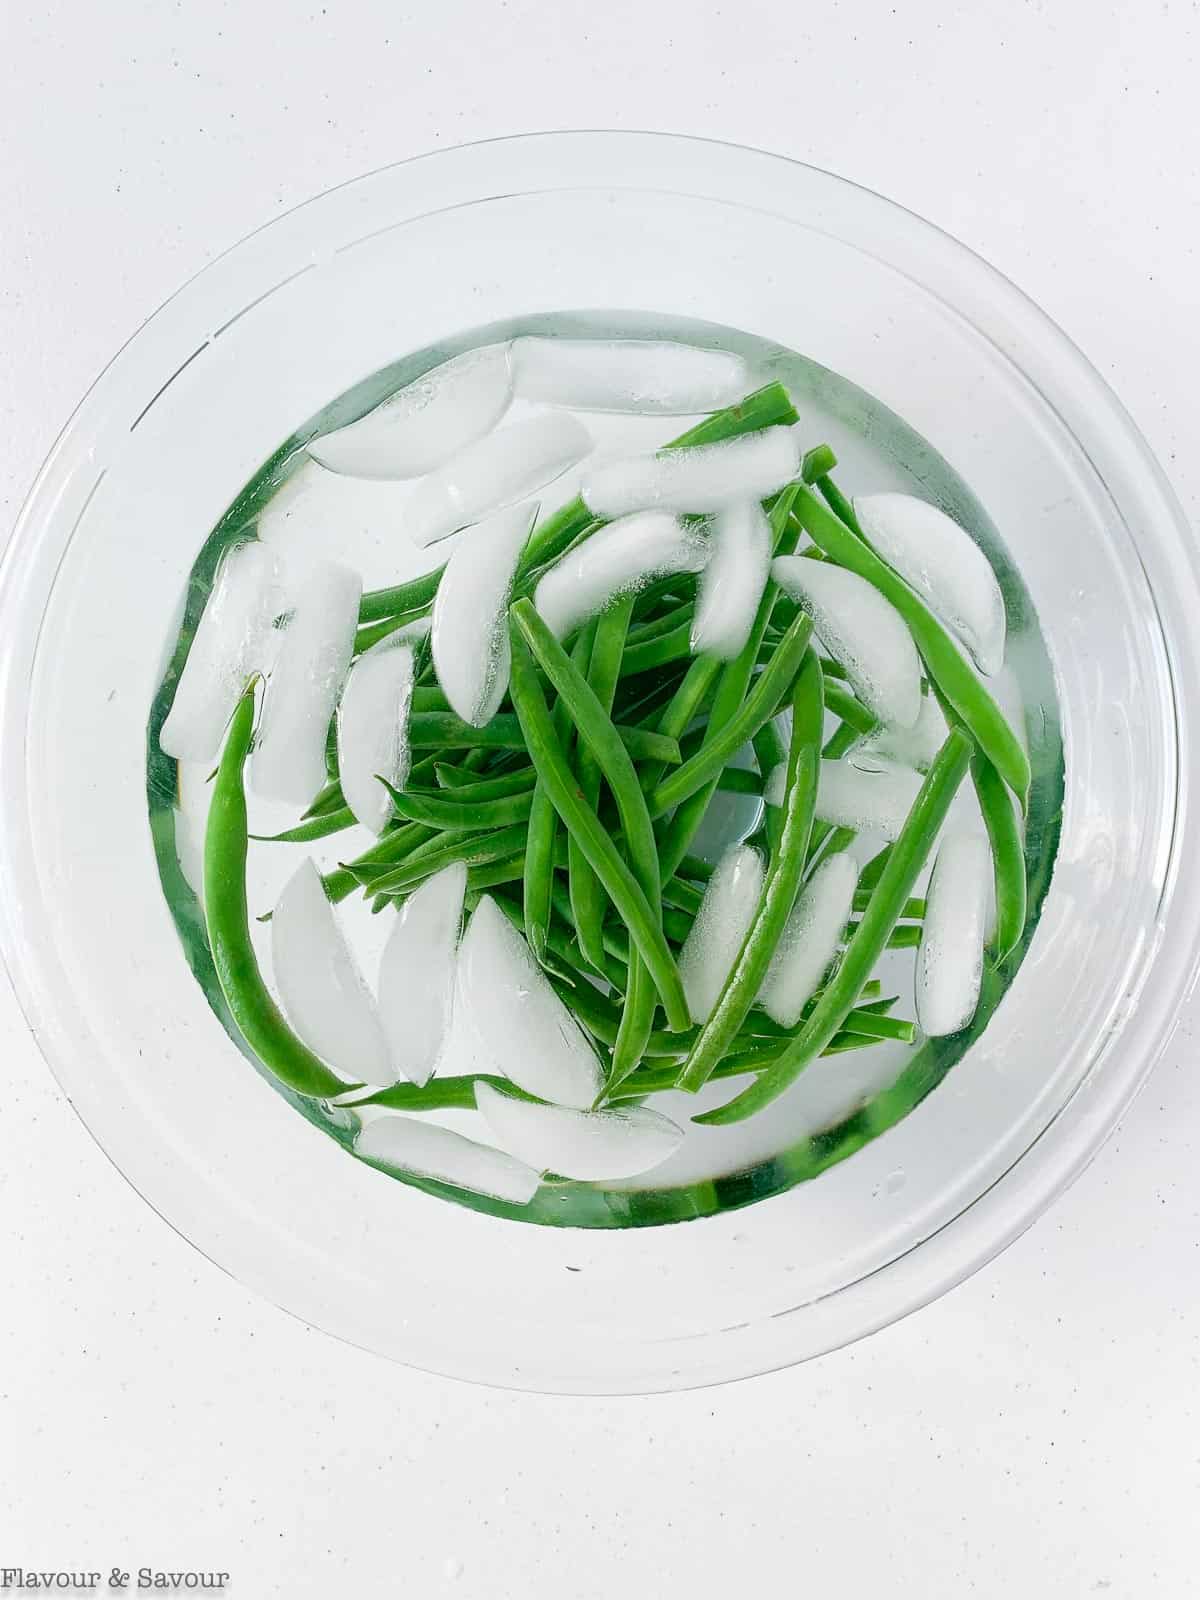
- Blanch the beans to preserve their colour and crispness. Bring a pot of water to a boil, then add the beans and boil for 30 seconds until the beans turn bright green.
- Shock the beans. Remove the beans and immediately plunge into an ice bath (a large bowl filled with ice and water) to stop the cooking. Once the beans are completely cool, drain and set aside.
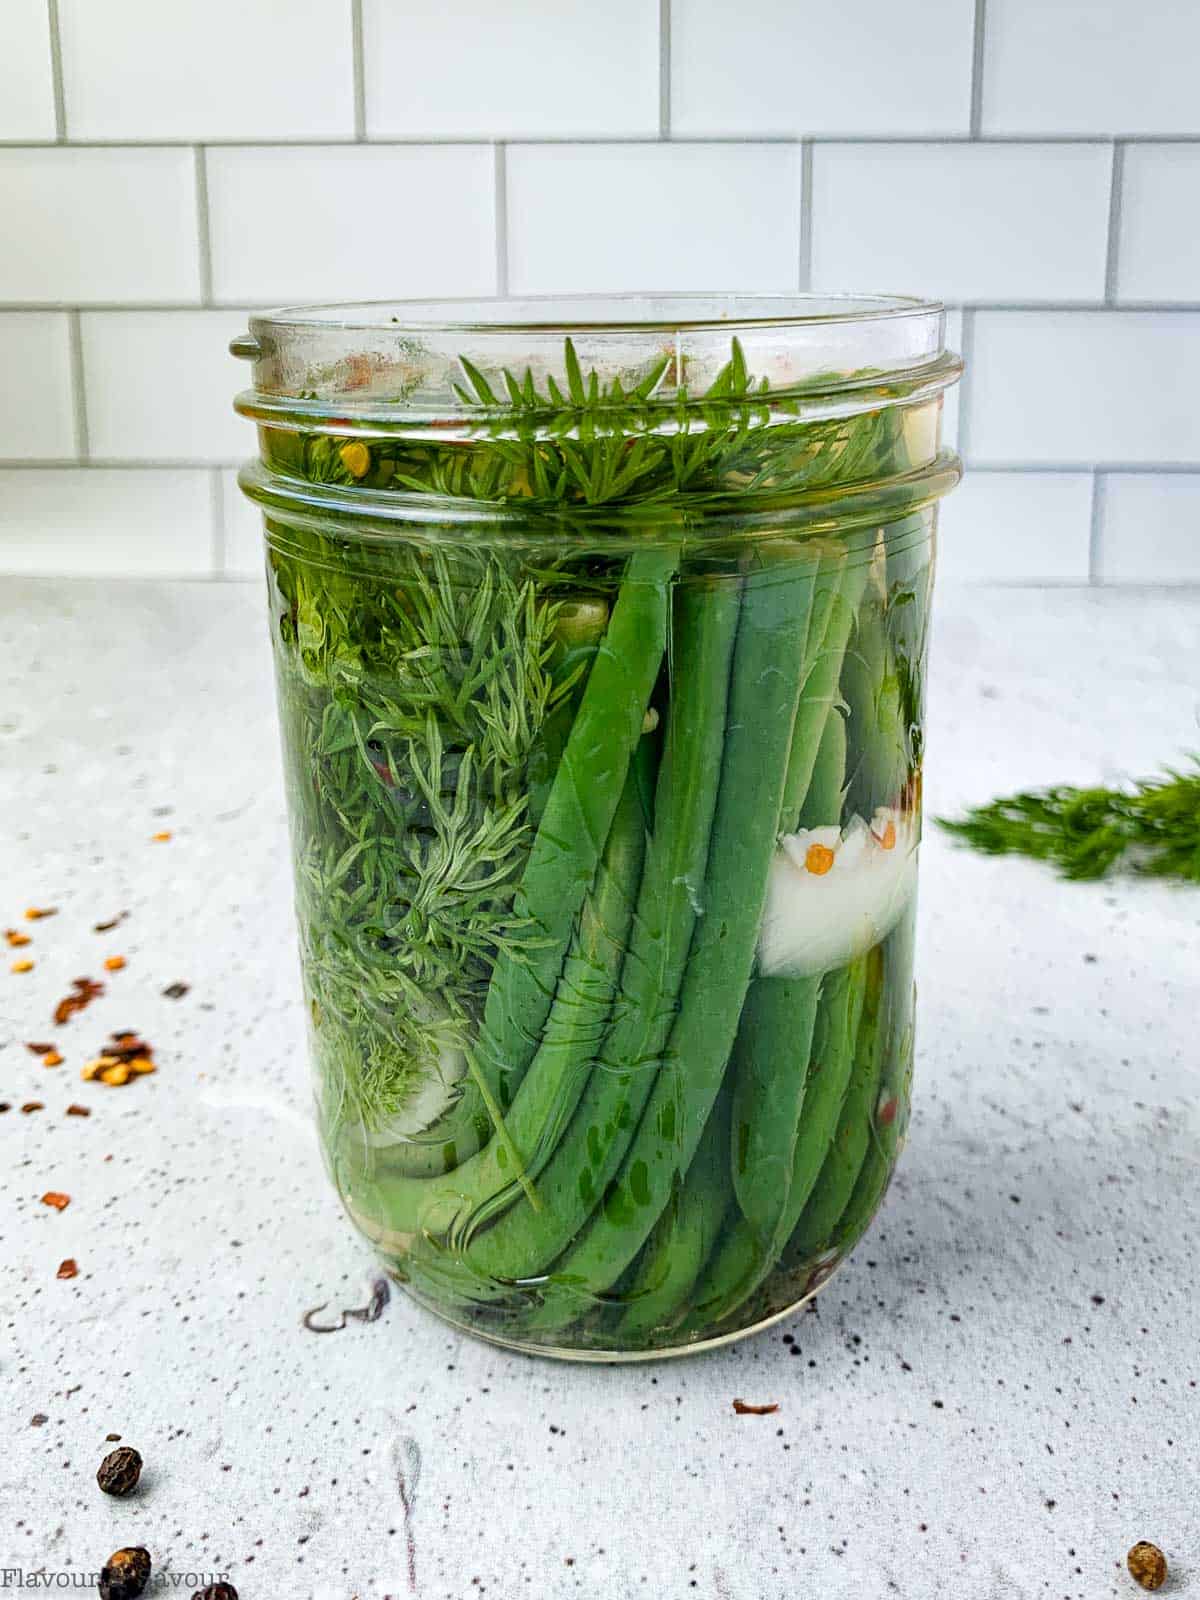
- Fill the jar with the cooled beans. Add the peppercorns, onion slice, red pepper flakes, and fresh dill.
- Cover with brine. Carefully pour the cooled brine into the jar so that the beans are completely covered. Check to make sure you've left at least ½ inch of headroom. The beans will shrink a little once they've been sitting in the brine for a few days. Wipe the top of the jar with a clean cloth and put the lid on tightly.


🔁 Possible Variations
Try different kinds of vinegar: you can use regular pickling vinegar or white vinegar, apple cider vinegar, white or red wine vinegar or even rice vinegar.
Add different seasonings: leave out the garlic if you don't like it. Add a spicy chili pepper.
Make spicy pickled green beans for your Bloody Mary or Caesar cocktails: add more dried chili flakes or a pinch of cayenne.
Add a little more dill for Dilly Green Beans.
How to store quick pickled beans
Refrigerator pickled beans must be stored in the fridge or they will spoil. While you can eat them right away, it's best to allow the flavours to develop for 2 to 3 days before eating.
Quick pickles will last up to 2 weeks or more in the refrigerator.
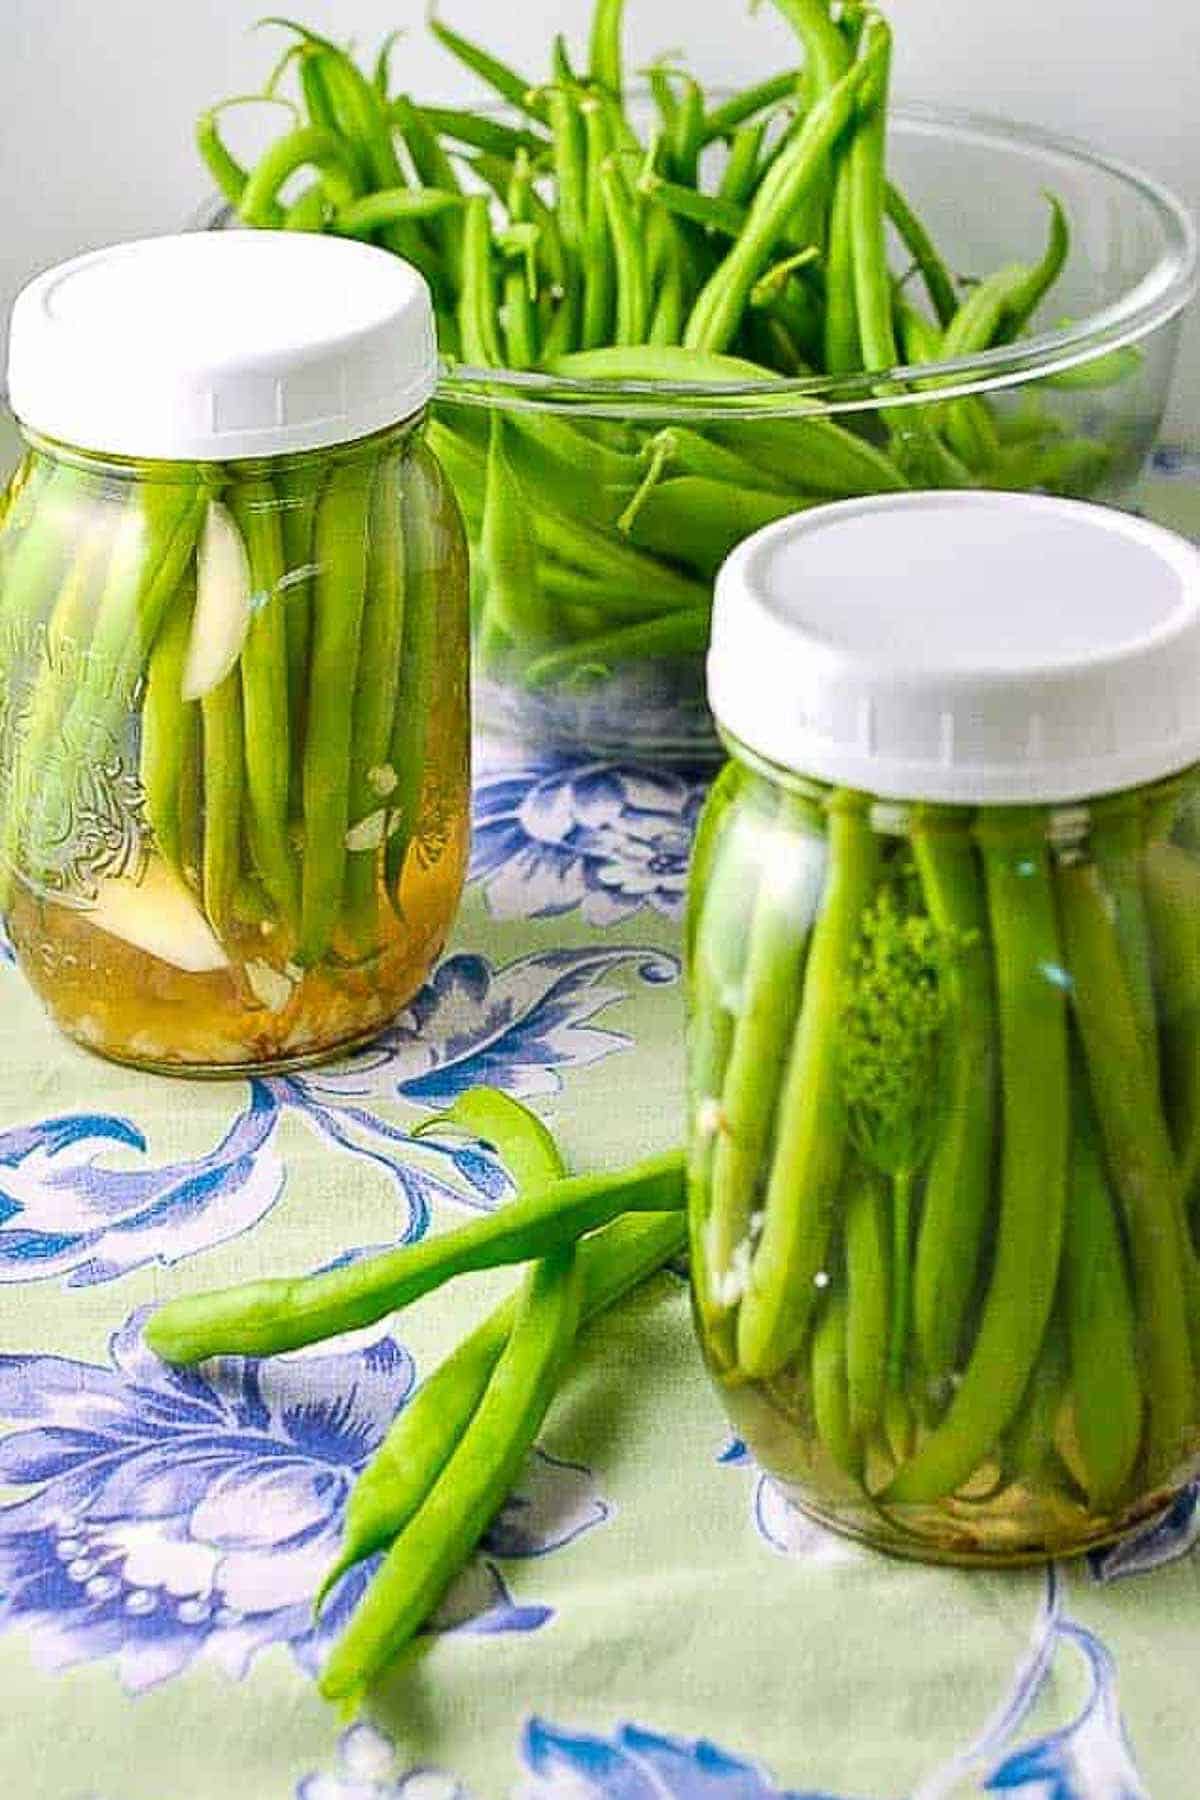
This recipe makes enough for one 16-ounce (2 cup) jar. During recipe testing, I doubled it and made 2 jars, one with white vinegar and one with apple cider vinegar.
Both are tasty, but the ones pickled in apple cider vinegar are a little stronger-tasting.
❓FAQ's about this pickled green bean recipe
These quick pickles will last for at least two weeks. If you notice the brine has turned cloudy, the beans may have spoiled. It's time to throw them out or compost them. I'd suggest adding a label to the jar to indicate the date you prepared them.
After 2 or 3 days they'll be deliciously tangy!
You can use any jar that has a tight-fitting lid. Make sure it is scrupulously clean. I find using a wide-mouth jar makes it easy to pack the pickles and to remove them, however, I've used both wide-mouth and narrow-mouth Mason jars successfully.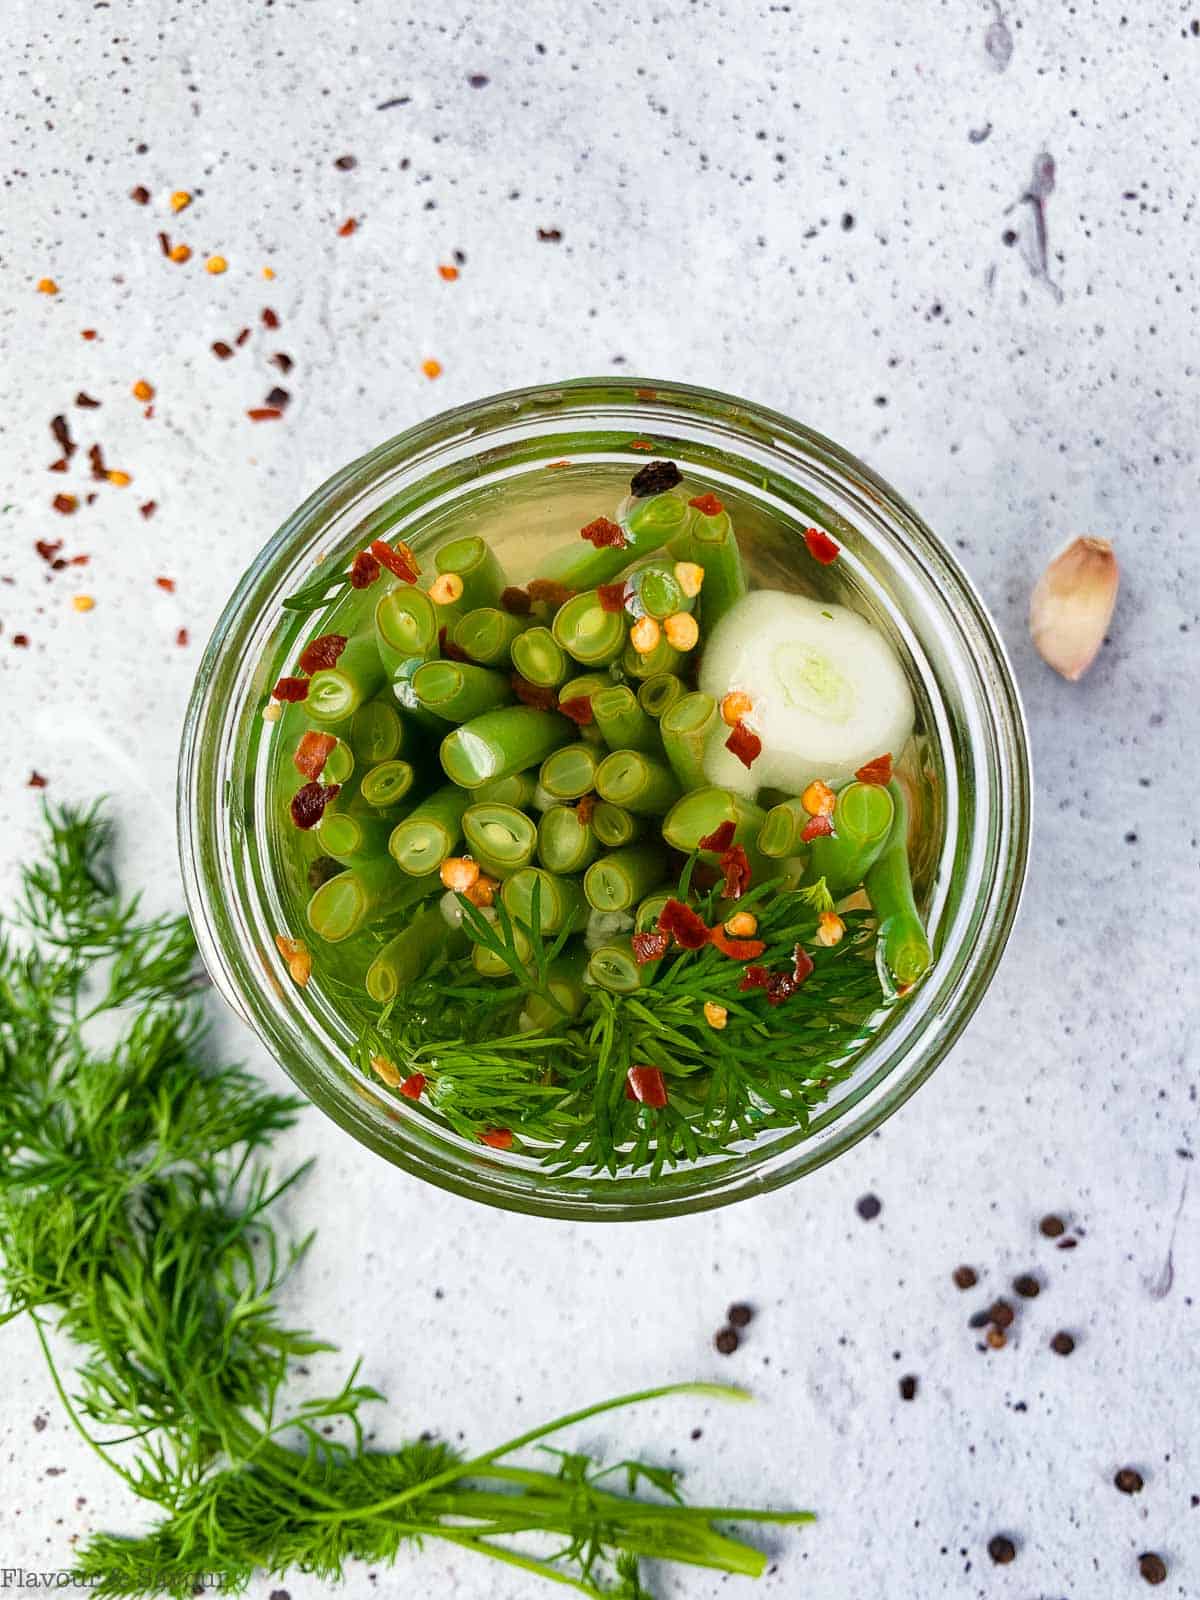
While it's important to use pickling salt when you are canning pickles, you can use other types of salt to make these refrigerator pickles, including sea salt or kosher salt.
This recipe calls for sea salt. The flavour may change if you use a different type of salt. Some home canning experts recommend avoiding table salt, as it contains iodine and possible anti-caking agents. These may discolour your pickles.
Some recipes suggest that it is not necessary to blanch beans before pickling. However, I like to spend the few minutes it takes to blanch beans to feel that I've pickled my beans safely.
Blanching decreases the number of foodborne pathogens that may be present on your beans. It also helps to extend the life of your pickles by destroying enzymes that may cause spoilage.
The National Center for Home Food Preservation does not recommend substituting artificial sweeteners in pickle recipes.
Safety Precautions for no-canning pickles
There are a few safety precautions you should take when making these pickles.
- Start with a clean surface area on which to work.
- Wash the beans and discard any that show signs of spoilage.
- Wash the jar in hot soapy water, rinse, then pour boiling water into both it and the lid. Let the jar sit with the boiling water in it while you prepare the brine.
- Make sure to bring the brine to a boil.
Don't be put off by these recommendations! I've made numerous jars of refrigerator pickles over the years and never had a problem!
Are refrigerator pickles safe for kids to eat?
While these pickles are generally considered safe to consume, any pickles have a chance of containing food-poisoning bacteria.
Most adults do not become seriously ill if they ingest this bacteria. However, if you are immune-compromised, pregnant, or have a weakened immune system from a disease, you should be careful about consuming refrigerator pickles.
Delicious ways to use pickled beans
Now that you've made them, here are a few ideas for how to serve them:
- As a snack: Pickled green beans make a great, crunchy snack on their own. Simply drain them from the brine and serve them as a healthy snack.
- In a salad: Add pickled green beans to your favorite salad recipe for an extra burst of flavor and texture. They pair well with a variety of greens, nuts, and cheeses, especially feta or goat cheese.
- On a charcuterie board: Pickled green beans make a beautiful addition to any charcuterie board. Arrange them alongside cheeses, cured meats, crackers, and other pickled vegetables for a colourful spread.
- As a garnish: Use pickled green beans as a garnish for cocktails, sandwiches, or other dishes. They add a tangy, crunchy element to spice up your dish.
- In a Bloody Mary or Caesar Cocktail: If you're a fan of these, try using pickled green beans as a garnish instead of celery. The brine from the beans adds an extra kick of flavour to your drink.
- In a stir-fry: Add pickled green beans to your favorite stir-fry recipe for a unique twist on a classic dish. They pair well with a variety of proteins and vegetables, and the tangy brine can help balance out richer flavors.
🗒 More recipes for quick refrigerator pickles
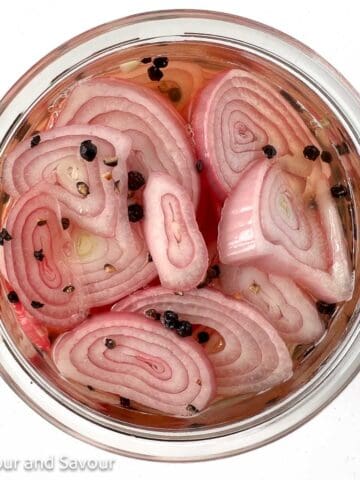
New to making pickles? Try these Quick Pickled Shallots with Apple Cider Vinegar. They're delicious on salads, sandwiches, burgers or wraps.
Refrigerator Pickled Jalapeños are a great addition to your favourite Mexican dishes, tacos, burritos, and salads like this Mango Black Bean Salad.
I like to add these Easy Refrigerator Pickled Red Onions to a charcuterie board, these Greek chicken burgers, scrambled eggs, or open-faced sandwiches. So good!
🌟 Did you make this recipe?
When you make these quick pickled green beans, please leave a comment and a rating below. I love hearing from you. Thanks in advance! Subscribe to my newsletter and have new recipes delivered straight to your inbox once a week.
This post has been updated with new information and photos.
📖 Recipe
Quick Refrigerator Pickled Beans
Equipment
Ingredients
- 2 cups green beans (fresh) enough to completely fill a 16 oz. Mason jar: about 2 cups, stems removed
- 1 cup vinegar, white or apple cider
- 1 cup water
- 2 teaspoon sugar
- 1 - 2 cloves minced garlic , OR 1 to 2 tablespoons minced garlic scapes
- 1 ½ teaspoon coarse sea salt
- 2 - 3 sprigs fresh dill
- 1 slice small onion
- ½ teaspoon whole black peppercorns
- ¼ to 1 teaspoon red pepper flakes, depending on how hot you want them
Instructions
- Make the brine first, as it needs to cool. Combine the vinegar, water, sugar, salt and garlic in a small saucepan and heat to boiling. Remove from heat and let cool.
- Prepare the beans. Wash the beans and remove the stems but leave the tip on. Use the straightest ones, then fill the jar so you know exactly how many to use.
- Remove them from the jar and trim the bunch all at once with a sharp knife so that they will fit in the jar with about ½ inch of headroom.
- Blanch and shock the beans to preserve their colour and crispness. Bring a pot of water to a boil, then add the beans and boil for 30 seconds. Remove the beans and immediately plunge into an ice bath (a large bowl filled with ice and water) to stop the cooking. Drain and set aside.
- Sterilize the jar and lid by washing in hot soapy water, rinsing thoroughly and pouring boiling water over all. Let it stand for a few minutes.
- Fill the jar with the beans. Add the peppercorns, onion slice, red pepper flakes, and fresh dill. Carefully pour the cooled brine over top so that the beans are completely covered. Put the lid on tightly. Store in the refrigerator. Allow the flavours to develop for at least 2 days.
- These will last for about 2 weeks in the refrigerator.
Lynn
Just tried the green beans recipe with ACV today after farmers market. I packed them tightly and consequently have a cup of brine left over. I decided to use the remainder to pickle red onions & jalapeno in a smaller jar. We're looking forward to seeing how all this comes out. Thank you.
Norinne
Excellent recipe. Making another 3 quarts today. We add more garlic and dill but love the flavour.
Adele
Very easy to make. Added some thinly sliced peppers to add color. Can hardly wait to taste!
Sierra
I haven't made these yet, but would it be ok to use a plastic jar lid (just regular reusable plastic ball lids) instead of the usual metal ring and separate lid?
T A L
Since it’s only going in the fridge, I think it’s fine to use a plastic lid.
Rebecca
I made this recipe the other day and I cannot wait to try them! But I had to laugh at two rookie mistakes I made:
Firstly, I put the garlic in the brine and it turned blue as the brine boiled. I know it's safe but it looks so weird and I had completely forgotten that it could do that. I took it out before I put it in the jar. (your recipe does not include ideas on how to avoid it... Do you have any ideas? I used sea salt, a stainless steel pan, I did not use distilled water nor did I blanche the garlic....those were the only suggestions I could find to avoid blue garlic)
Also, I added some radish that I had cut in half because I thought they would look so cute with their long tails and of course they leached out their color and turned the vinegar pink.
So the jars are not as cute as I had hoped, but it was a first attempt, and I am looking forward to tasting them!! Thanks for a fun recipe.
Elaine
Hi Rebecca, Thanks for sharing your "garlic experience!" I have never had that happen. It seems like you did everything right: avoiding iodized salt, using a stainless steel pan, avoiding copper utensils, etc. I know it can be a common chemical reaction, but I'm wondering if it might be the variety of garlic or its age. If you're using tap water, it could contain trace amounts of copper. I hope this helps a little! Thanks so much for commenting!
Knar
I forgot to blanch the beans. Will this affect anything? I’m wondering if it will taste like raw beans?
Elaine
No need to worry! They should be fine. They may not be as crisp but they should still be good.
Paul K
I made this yesterday afternoon and they were ready for my Bloody Mary this morning. Delicious. The only difference is I blanched them for two minutes.
Elaine
Happy to hear they helped you start your day off right! Thanks for sharing your adaptation!
Melissa Bongioanni
I want to use this recipe to do some quick pickled green beans. My question is that I grew pole beans for the first time. Would they work in place of bush beans?
Elaine
Great question--and I wish I had a definite answer! I haven't pickled pole beans before, but I don't see any reason why they wouldn't work. Keep me informed, Melissa! I'd love to hear how they turn out!
Linda Glass
Can I make this recipe without the dill?? Or, can I use dried dill?
Elaine
You can certainly leave out the fresh dill. If you don’t have fresh dill, usually pickle recipes call for dill seeds, not dried dill. Let me know how they turn out!
Mark
I used rice vinegar and instead of regular sugar, I used brown sugar with the soy sauce (instant teriyaki flavor). Top with some taosted sesame seeds and a drizzle of sesame oil and it will give them an Asian twist.
Elaine
Oooh! I love this idea! Thanks for sharing it!
Leigh
Super good, perfect flavor!
Elaine
Happy to hear that! Thanks for the 5 stars!
Kristi Aaker
Just made these dill beans! I placed a grape leaf on top of the beans to keep them down in the brine. Will this work on Beans?
I do it for my refegerator pickles.
I'll find out in about 3 days!
Thanks for the recipe, it was very easy!
Elaine
Hi Kristi, It should help to keep the beans crisp! I'm glad to hear you found this recipe easy. Thanks for taking the time to comment and share your idea!
Teri
Do you need to add the sugar? I don't like sweet pickles.
Elaine
Hi Teri, These pickle beans aren't sweet at all. The sugar is necessary to balance the vinegar. Without it, the pickles will be too sour. Thanks for your question! I hope this helps!
Jenn
Can I use yellow beans?
Elaine
Yes! They’ll be delicious!
Jeff
I'm wondering if it would be possible to make these with frozen green beans?
Elaine
Hi Jeff, I don't think previously frozen green beans would make good refrigerator pickles. You may have success canning them in a hot water bath, but to my knowledge, frozen beans would end up mushy if you try to make fridge pickles. Thanks for your question!
Cyndy
I think it might work if you don’t coook them more, just put them I. After defrosting
Mae
I made these today and they turned out beautifully--crisp and crunchy! So proud of myself lol--just had to share.
Elaine
That's great news, Mae! Happy to hear you're making pickles now!
Brooke Andersen
Thank you! I enjoyed making these and have about 3 or 4 jars right now.
Elaine
That's great to hear! Thanks for commenting!
Angie
Super easy and a great base! I added real chili peppers and jalapeños and extra garlic and used monk fruit instead of sugar. They are delicious and spicey, my husband wants me to make more but to increase the dill so that’s tonight’s project.
Elaine
Thanks Angie! That sounds like a delicious adaptation. Thanks for sharing it with the rest of us!
Dennis
Best dilly beans I've made, stayed crisp. Must be the blanching and ice bath.
Elaine
I'm happy to hear that! Yes--blanching the beans will help make them last longer too.
Margo
Super easy!
Elaine
Thanks Margo! And thnks for the 5 stars, too!
Laura
Yum
Elaine
Happy to hear they turned out for you, too. Thanks for the 5 stars!
Liz
Easy-peasy and nice and crunchy! Great recipe.
Elaine
Thanks so much, Liz!
Dierdre
These pickled beans are really good! Super crunchy and so easy to make. Thank you. I had never made pickles before, but I will make these again.
Linda Hearsey
Hi Elaine
I have been pickling for yrs and figured out early that cider vinegar was not the right fit for us. Much too strong of a flavour. I made refridgerated dills the other day for the first time and am now hooked. I am trying your pickled beans this way now.
Flavour & Savour
Hi Linda,
I don't mind the flavour, but I didn't like the colour of the ones pickled in apple cider vinegar. I've stuck with the white vinegar too. Happy pickling!
Barb Marchi
Hi Elaine! Just love looking and trying your recipes! Thank you for sharing your many talents!
Flavour & Savour
You made my day, Barb! Thanks so much 🙂