Start your dinner Italian style! Here are 6 tips for how to make an Antipasto Platter or charcuterie board that will meet everyone's needs and let you enjoy spending time with your friends.

Italians know how to host a dinner.
They anticipate that their guests will arrive hungry, and yet they know that rushing to get dinner on the table is not the way to enjoy an evening. The antipasto (literally translated as "before the meal") is the beginning of every Italian meal. It's always shared and it consists of a variety of delicacies like cheese, charcuterie, olives or other pickled vegetables, bread, and preserves.
A charcuterie board or a cheese platter is designed to whet the appetite, encourage conversation, and mark the start of an enjoyable meal.
Jump to:
Six tips to make the best antipasto platter
During a trip to Italy, we found that the antipasto items varied as we moved from region to region. In the south, it included seafood, Pecorino cheese was featured in the hill towns of Tuscany, and Parma ham dominated in the Emilia-Romagna region. Often our favorite appetizer is a simple platter of cheese and olives.
To try to recreate those special memories of time spent in sunny outdoor cafés and cozy trattorias, it's fun to assemble a beautiful antipasto platter. Use both imported and local ingredients, some straight from your garden or farmer's market.
Here are six tips for how to make an antipasto platter that everyone will love. Here's my step-by-step guide for what to include and how to arrange a beautiful appetizer plate.

How to Make an Antipasto Platter
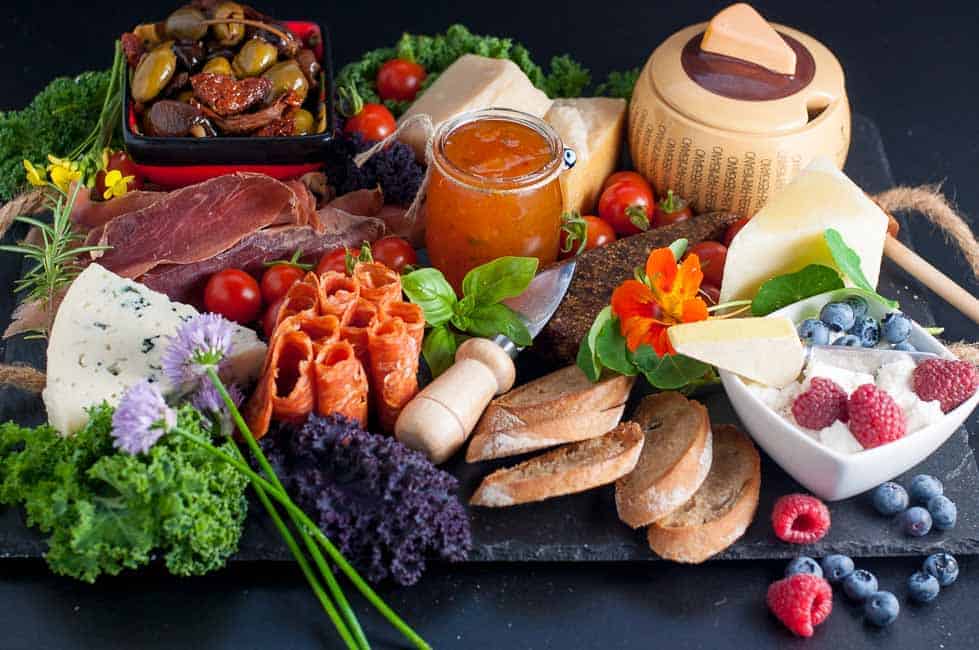
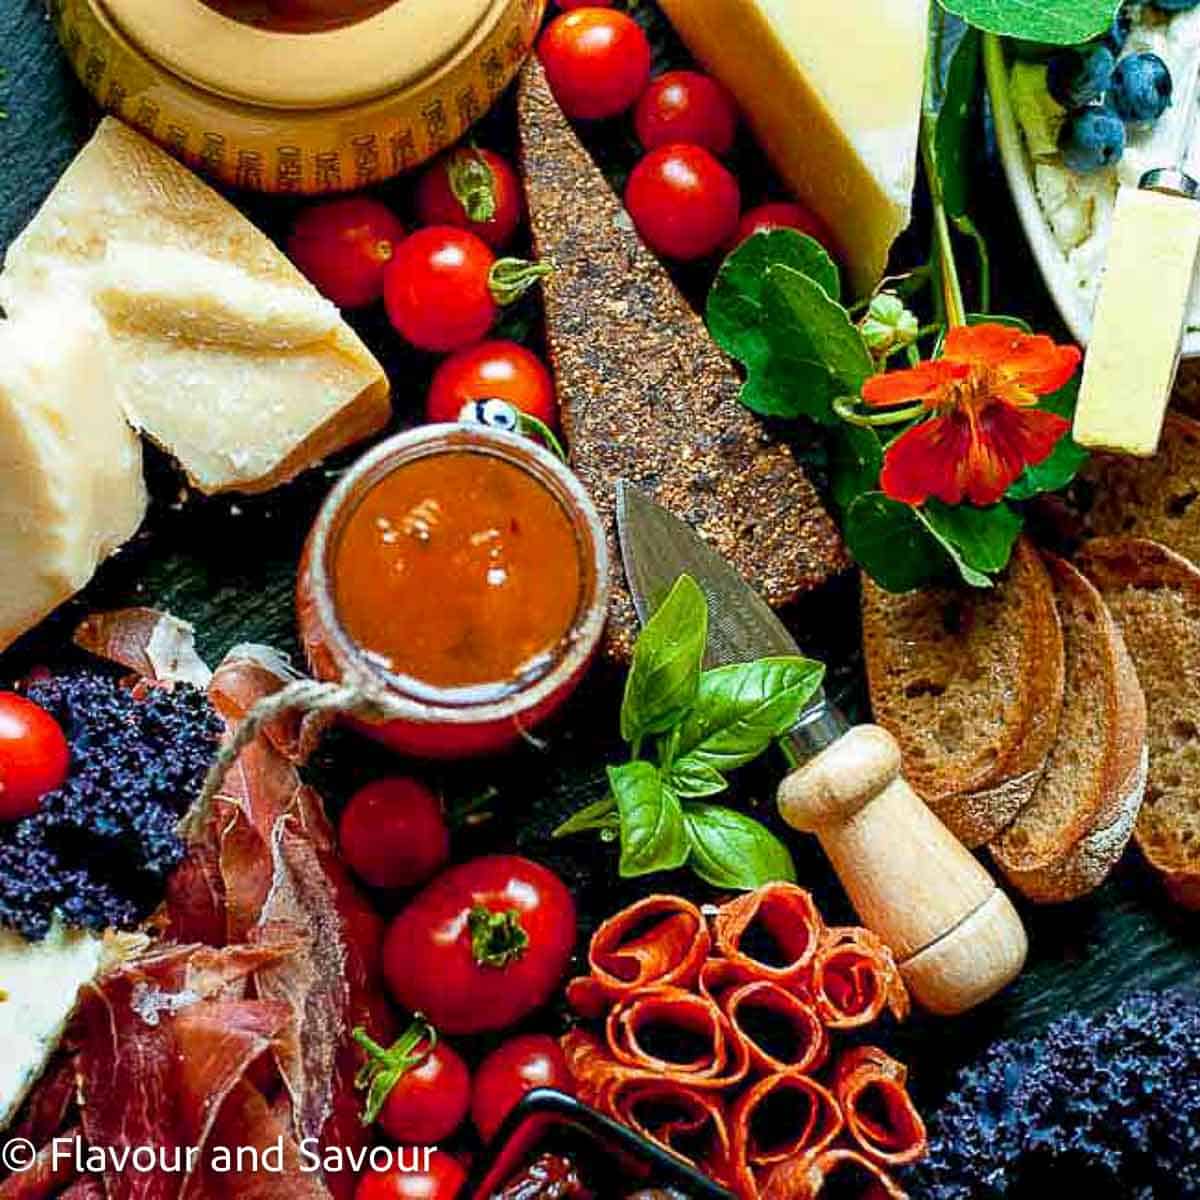
- Choose a variety of types of cheese with different textures made from different types of milk. Some of your guests may have an allergy or sensitivity to cow's milk but can tolerate cheese made from goat or sheep's milk. I usually offer chunky Parmigiano Reggiano and soft but sharp blue cheese (cow's milk), a firm Pecorino (sheep's milk), and creamy goat cheese. I find it best to avoid flavored cheeses on a platter like this. There are so many other flavors in the cured meats and preserves. Cut some of the cheese in advance to make it easy for your guests to serve themselves. Don't cut it too thinly, or it will sweat and look positively unappetizing. Provide a small cheese knife for other blocks of cheese.
- Loosely arrange the cured meats you have chosen so that they are easy to pick up from the platter. Give each of the prosciutto slices a twist before piling them up and twirl the capicolla into circles before arranging the thin slices. You can also make salami roses if you'd like.
- Offer pickled or preserved items. Include an olive assortment, a wedge of fig cake, and a tiny jar of homemade spicy jam. Roasted peppers, artichokes, or sun-dried tomatoes would be good, too.
- Include toasted crostini and/or freshly sliced baguette (or gluten-free crackers) to provide a base for the other items.
- People eat with their eyes first. Take time to arrange the items on your antipasto platter artistically, instead of lining them up in rows. An antipasto platter like this encourages your guests to create their combinations, mixing and matching flavors.
- You can assemble your antipasto ahead of time, but remove it from the fridge 30 to 45 minutes before serving time. Cheese has the most flavor when it is served at room temperature.

Helpful Tips
In this charcuterie platter, I drizzled honey on Pecorino, spread goat cheese on crostini, and topped it with peach pepper jam. I skewered slices of prosciutto with chunks of Parmesan and an olive.
I included fresh greens, edible flowers, tomatoes, and berries to fill in the spaces on the serving board.
When I'm preparing a dinner party menu, it's helpful to have an appetizer that consists mainly of store-bought items.
This charcuterie board is quick and easy to assemble. It will keep everyone happy while you're putting the finishing touches on dinner!
Be food safe! Don't let food sit at room temperature for longer than 2 hours. Store leftover items in airtight containers in the fridge.
You'll find more appetizer ideas in this collection of 25 Finger Foods and Party Appetizers.
📖 Recipe

How to Make an Antipasto Platter
Ingredients
- 3 - 4 different types of cheese. Include different textures and cheese made from different types of milk .
- 2-3 types of cured meats
- 2-3 types of preserves like pickles, or olives
- bread or crackers
- fresh vegetables or fruit
Instructions
- Arrange all items artistically on a large platter.
- Cover and refrigerate until 30 - 45 minutes before serving time.


Amanda (Peppers & Pennies)
Well, I need a bigger cheese plate now don't I? This is a lovely and helpful post. Thanks you!
Flavour & Savour
Thanks Amanda! lol Anything will do--even a cutting board!
Redawna
What a gorgeous platter! It looks fantastic. Thanks for the great information.
Flavour & Savour
Thanks Redawna! It's an easy way to entertain!
Mardi (eat. live. travel. write.)
Great tips - these are excellent items to always have on hand so you can entertain unexpected guests at a moment's notice!
Flavour & Savour
Thanks Mardi,
I find an antipasto platter is so much easier than fussing with little canapes sometimes!